
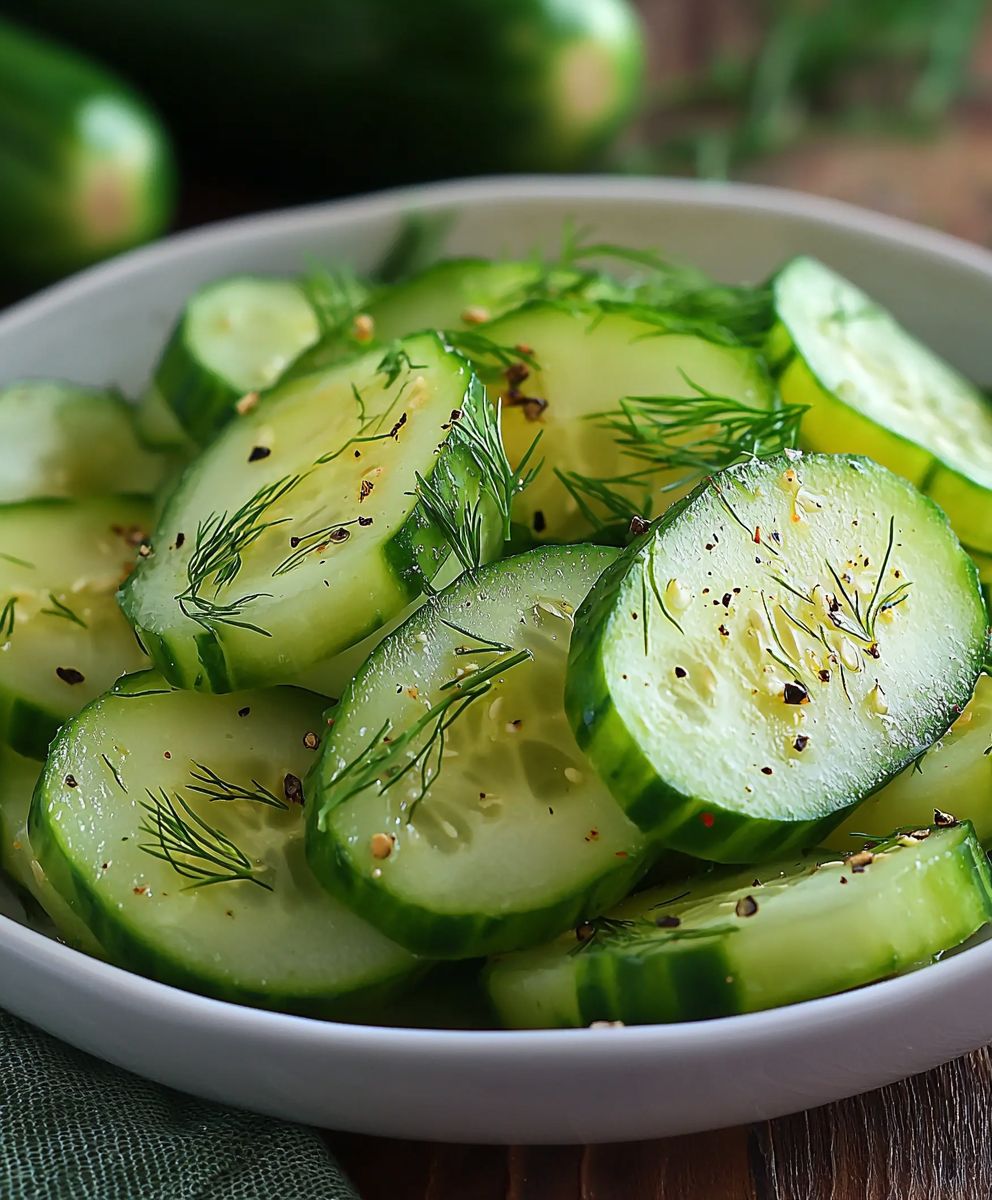
Garlic dill cucumbers, a symphony of crispness and tangy delight, are about to become your new favorite side dish! Forget those bland, soggy pickles you find on grocery store shelves. We’re talking about vibrant, homemade cucumbers bursting with fresh garlic, fragrant dill, and a perfectly balanced brine that will tantalize your taste buds.
The simple cucumber, often overlooked, has a rich history dating back to ancient civilizations. Originating in India, cucumbers spread throughout the world, becoming a staple in various cuisines. Pickling, a method of preserving food, has been practiced for centuries, allowing people to enjoy the refreshing taste of cucumbers even out of season. In many Eastern European cultures, garlic dill cucumbers are more than just a side dish; they’re a symbol of hospitality and a cherished family tradition, passed down through generations.
What makes these cucumbers so irresistible? It’s the perfect combination of textures and flavors. The satisfying crunch of the cucumber, the pungent kick of garlic, the herbaceous aroma of dill, and the subtle sweetness and acidity of the brine create a harmonious balance that’s simply addictive. Plus, they’re incredibly easy to make! With just a few simple ingredients and minimal effort, you can have a batch of these flavorful cucumbers ready to enjoy in no time. Whether you’re serving them alongside grilled meats, adding them to sandwiches, or simply snacking on them straight from the jar, garlic dill cucumbers are guaranteed to be a crowd-pleaser.

Ingredients:
- 6-8 medium cucumbers, preferably pickling cucumbers
- 1 large bunch of fresh dill, about 1 cup chopped
- 6-8 cloves garlic, minced
- 1/4 cup kosher salt
- 4 cups water
- 1 cup white vinegar (5% acidity)
- 1 tablespoon sugar (optional, for a touch of sweetness)
- 1 teaspoon black peppercorns
- 1/2 teaspoon red pepper flakes (optional, for a little heat)
- 2 bay leaves (optional)
- Ice cubes (optional, for crispier cucumbers)
Preparing the Brine:
Okay, let’s get started with the brine! This is the key to flavorful and perfectly preserved garlic dill cucumbers. The brine not only flavors the cucumbers but also helps to inhibit the growth of unwanted bacteria, ensuring they stay fresh and crisp.
- Combine Water, Salt, and Sugar: In a large, non-reactive pot (stainless steel or enamel is best; avoid aluminum), combine the 4 cups of water, 1/4 cup of kosher salt, and the 1 tablespoon of sugar (if using).
- Bring to a Boil: Place the pot over medium-high heat and bring the mixture to a rolling boil. Stir occasionally to ensure the salt and sugar dissolve completely. You should no longer see any granules at the bottom of the pot.
- Simmer and Add Vinegar: Once boiling, reduce the heat to low and simmer for about 5 minutes. This helps to fully dissolve the salt and sugar and allows the flavors to meld together slightly. Then, stir in the 1 cup of white vinegar.
- Cool the Brine: Remove the pot from the heat and allow the brine to cool completely. This is crucial! Adding hot brine to the cucumbers will make them soft and mushy. You can speed up the cooling process by placing the pot in an ice bath or transferring the brine to a heat-safe bowl and refrigerating it. The brine should be completely cool to the touch before moving on to the next step.
Preparing the Cucumbers:
While the brine is cooling, let’s get the cucumbers ready. The preparation method depends on whether you want whole, sliced, or spear-shaped pickles. I personally love spears, but feel free to choose your favorite!
- Wash the Cucumbers: Thoroughly wash the cucumbers under cold running water to remove any dirt or debris. Use a vegetable brush if necessary.
- Trim the Ends: Trim about 1/4 inch off both ends of each cucumber. This removes the blossom end, which contains enzymes that can cause the pickles to soften.
- Cut the Cucumbers (Optional): If you want whole pickles, skip this step. For spears, cut each cucumber lengthwise into quarters. For slices, cut the cucumbers into 1/4-inch thick rounds.
- Optional: Ice Bath for Extra Crispness: If you want extra-crisp pickles, place the cut cucumbers in a bowl of ice water for about 30 minutes. This helps to draw out excess moisture and firm up the cucumbers. Drain them well before proceeding.
Packing the Jars:
Now comes the fun part – packing the jars! Make sure your jars are clean and sterilized. You can sterilize them by boiling them in water for 10 minutes or running them through a hot dishwasher cycle.
- Prepare the Jars: Ensure your jars are clean and dry. I usually use pint-sized (16-ounce) mason jars, but you can use larger or smaller jars depending on your preference.
- Add Flavorings to Each Jar: Divide the minced garlic, chopped dill, black peppercorns, red pepper flakes (if using), and bay leaves (if using) evenly among the jars. I usually put about 1-2 cloves of garlic, a generous sprig of dill, a pinch of peppercorns, and a pinch of red pepper flakes in each pint jar.
- Pack the Cucumbers Tightly: Pack the cucumbers tightly into the jars, leaving about 1/2 inch of headspace at the top. Headspace is the space between the top of the cucumbers and the lid of the jar. This is important for proper sealing. If you’re using spears, stand them upright in the jar. If you’re using slices, layer them evenly.
- Pour the Brine Over the Cucumbers: Carefully pour the cooled brine over the cucumbers in each jar, ensuring that the cucumbers are completely submerged. Again, leave about 1/2 inch of headspace. You may need to gently tap the jars on the counter to release any air bubbles.
- Remove Air Bubbles: Use a clean utensil (like a chopstick or a plastic knife) to gently poke around the inside of the jars to release any trapped air bubbles.
- Wipe the Jar Rims: Wipe the rims of the jars with a clean, damp cloth to remove any spills or drips. This ensures a good seal.
- Place Lids and Rings: Place the lids on the jars and screw on the rings until they are fingertip tight. This means tightening them until you feel resistance, then backing off slightly. Do not overtighten the rings, as this can prevent the jars from sealing properly.
Refrigerating and Waiting:
Almost there! Now comes the hardest part – waiting for the flavors to develop. These are refrigerator pickles, so they don’t require canning. This makes them super easy to make, but it also means they need to be stored in the refrigerator and will have a shorter shelf life than canned pickles.
- Refrigerate the Jars: Place the jars in the refrigerator.
- Wait Patiently: Allow the pickles to sit in the refrigerator for at least 3 days, or preferably 5-7 days, before eating. This allows the flavors to fully develop and the cucumbers to pickle properly. The longer they sit, the more flavorful they will become.
- Enjoy! After the waiting period, your garlic dill cucumbers are ready to enjoy! Keep them refrigerated and they should last for about 2-3 weeks.
Tips and Variations:
Here are a few extra tips and variations to help you customize your garlic dill cucumbers:
- Spice it Up: For extra heat, add more red pepper flakes or a few slices of fresh jalapeño to each jar.
- Add Other Herbs: Experiment with other herbs like mustard seeds, coriander seeds, or celery seeds for a different flavor profile.
- Sweet Pickles: If you prefer sweeter pickles, increase the amount of sugar in the brine. You can also use honey or maple syrup instead of sugar.
- Dill Variations: If you don’t have fresh dill, you can use dried dill, but the flavor won’t be as intense. Use about 1 tablespoon of dried dill per jar. You can also add dill seeds for a more concentrated dill flavor.
- Garlic Lovers: If you’re a garlic fanatic like me, feel free to add even more garlic to each jar!
- Crispness Tips: To ensure the crispiest pickles, use pickling cucumbers, trim the ends, soak the cucumbers in ice water, and avoid over-packing the jars. You can also add a grape leaf to each jar, as grape leaves contain tannins that help to keep the cucumbers crisp.
- Vinegar Variations: While white vinegar is the most common choice for pickling, you can also use apple cider vinegar or white wine vinegar for a slightly different flavor.
- Testing for Doneness: After a few days, taste a pickle to see if it’s to your liking. If it’s not sour or garlicky enough, let it sit for a few more days.
I hope you enjoy this recipe for garlic dill cucumbers! They’re a delicious and easy way to preserve the flavors of summer. Let me know in the comments if you have any questions or if you try any variations!
Conclusion:
So, there you have it! This recipe for garlic dill cucumbers is truly a must-try. I know, I know, I’m biased, but trust me on this one. The crisp, refreshing bite of the cucumbers, perfectly balanced with the pungent garlic and fragrant dill, creates a flavor explosion that will have you reaching for more. It’s simple, it’s quick, and it’s incredibly satisfying. What more could you ask for?
But beyond just the amazing taste, this recipe is a winner because it’s so versatile. It’s the perfect side dish for grilled meats, adding a cool and tangy counterpoint to richer flavors. Imagine these cucumbers alongside a juicy steak, some grilled chicken, or even some flavorful sausages. They’re also fantastic with fish, especially salmon or cod. The dill and garlic complement the delicate flavors of the fish beautifully.
And don’t limit yourself to just serving them as a side! These garlic dill cucumbers are also incredible in sandwiches and wraps. Add them to a veggie burger for an extra layer of flavor and crunch, or use them as a topping for tacos. They’re even delicious on their own as a light and healthy snack. I sometimes just grab a bowl of them straight from the fridge when I’m craving something refreshing.
Looking for variations? The possibilities are endless! For a spicier kick, add a pinch of red pepper flakes or a thinly sliced jalapeño to the brine. If you prefer a sweeter flavor, add a tablespoon of honey or maple syrup. You can also experiment with different herbs. Try adding some fresh mint or parsley for a different twist. And if you’re feeling adventurous, try using different types of vinegar. Rice vinegar or apple cider vinegar would both be delicious.
Another fun variation is to use different types of cucumbers. While I typically use English cucumbers because they have thin skin and few seeds, you could also use Kirby cucumbers, which are smaller and have a slightly more tart flavor. Or, if you’re feeling really ambitious, you could even try pickling some baby cucumbers!
The key to success with this recipe is to use fresh, high-quality ingredients. Fresh dill is a must, and good quality garlic will make a big difference. And don’t be afraid to experiment with the amount of garlic and dill to suit your own taste. Some people prefer a more garlicky flavor, while others prefer a more subtle dill flavor.
I truly believe that this recipe for garlic dill cucumbers is a game-changer. It’s a simple, delicious, and versatile recipe that you’ll find yourself making again and again. It’s the perfect way to add a touch of freshness and flavor to any meal.
So, what are you waiting for? Head to the kitchen and give this recipe a try! I promise you won’t be disappointed. And when you do, please share your experience with me! I’d love to hear what you think and what variations you come up with. Leave a comment below, or tag me on social media. I can’t wait to see your creations! Happy cooking!
Garlic Dill Cucumbers: The Ultimate Guide to Pickling Perfection
Crisp, flavorful garlic dill cucumbers, perfect as a snack or side. Easy-to-make refrigerator pickles bursting with fresh flavors.
Ingredients
- 6-8 medium cucumbers, preferably pickling cucumbers
- 1 large bunch of fresh dill, about 1 cup chopped
- 6-8 cloves garlic, minced
- 1/4 cup kosher salt
- 4 cups water
- 1 cup white vinegar (5% acidity)
- 1 tablespoon sugar (optional, for a touch of sweetness)
- 1 teaspoon black peppercorns
- 1/2 teaspoon red pepper flakes (optional, for a little heat)
- 2 bay leaves (optional)
- Ice cubes (optional, for crispier cucumbers)
Instructions
- Prepare the Brine: In a large, non-reactive pot, combine water, salt, and sugar (if using). Bring to a rolling boil, stirring until dissolved. Reduce heat and simmer for 5 minutes. Stir in vinegar.
- Cool the Brine: Remove from heat and let the brine cool completely.
- Prepare the Cucumbers: Wash cucumbers and trim 1/4 inch off both ends. Cut into spears or slices, or leave whole. For extra crispness, soak in ice water for 30 minutes and drain well.
- Pack the Jars: Ensure jars are clean and dry. Divide garlic, dill, peppercorns, red pepper flakes (if using), and bay leaves (if using) evenly among the jars. Pack cucumbers tightly into the jars, leaving 1/2 inch of headspace.
- Pour Brine and Seal: Carefully pour the cooled brine over the cucumbers, ensuring they are submerged and leaving 1/2 inch of headspace. Tap jars to release air bubbles. Wipe jar rims, place lids, and screw on rings until fingertip tight.
- Refrigerate: Place jars in the refrigerator.
- Wait: Allow pickles to sit in the refrigerator for at least 3 days, or preferably 5-7 days, before eating.
- Enjoy: Keep refrigerated and consume within 2-3 weeks.
Notes
- For extra heat, add more red pepper flakes or jalapeño slices.
- Experiment with other herbs like mustard seeds, coriander seeds, or celery seeds.
- Adjust sugar to taste for sweeter pickles.
- Use dried dill if fresh is unavailable (1 tablespoon per jar).
- Add a grape leaf to each jar for extra crispness.
- Apple cider vinegar or white wine vinegar can be used instead of white vinegar.
- Taste after a few days and let sit longer if needed.

Leave a Comment