
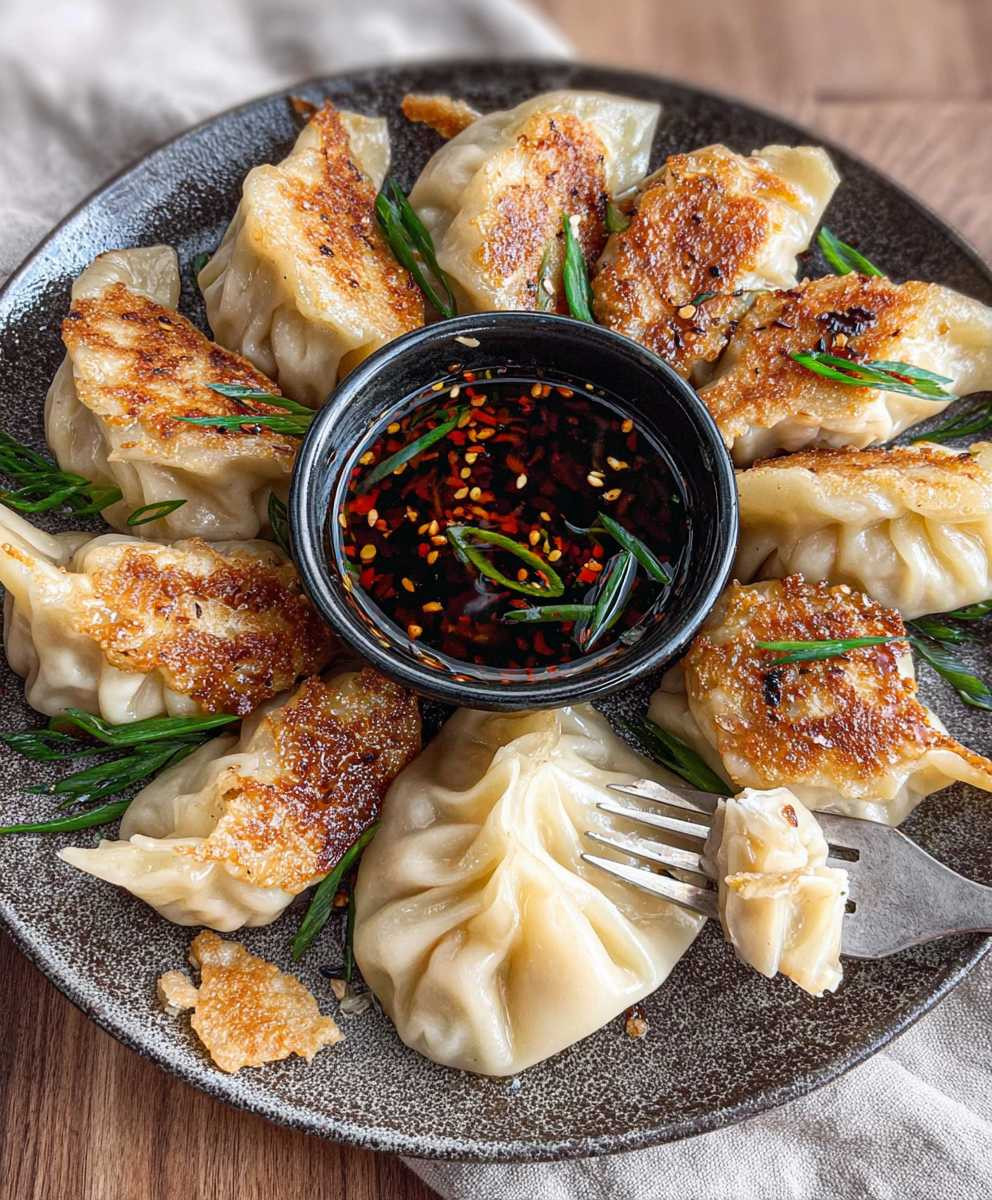
Chicken Potstickers Pan Fried: Crispy bottoms, juicy filling, and a savory dipping sauce – need I say more? These aren’t just dumplings; they’re little pockets of happiness that explode with flavor in every bite. I’m thrilled to share my foolproof method for achieving potsticker perfection right in your own kitchen.
Potstickers, also known as “guo tie” in Mandarin Chinese, boast a history as rich and flavorful as the dumplings themselves. Legend has it that they were accidentally created when a chef in the Song Dynasty overcooked boiled dumplings, resulting in a delightful crispy bottom. From that happy accident, a culinary star was born! These dumplings have become a beloved staple in Asian cuisine, enjoyed during Lunar New Year celebrations and as a comforting everyday meal.
What makes Chicken Potstickers Pan Fried so irresistible? It’s the delightful contrast of textures – the satisfying crunch of the pan-fried base against the tender, juicy chicken filling. The savory blend of ginger, garlic, and soy sauce creates an umami explosion that keeps you coming back for more. Plus, they’re surprisingly easy to make once you get the hang of it, making them a fantastic option for a weeknight dinner or a fun weekend cooking project. Get ready to impress your family and friends with these delectable dumplings!

Ingredients:
- For the Potsticker Dough:
- 3 cups all-purpose flour, plus more for dusting
- 1 cup hot water (not boiling, but very hot)
- 1/2 teaspoon salt
- For the Chicken Filling:
- 1 pound ground chicken
- 1 cup finely chopped napa cabbage
- 1/2 cup finely chopped green onions
- 1/4 cup finely grated ginger
- 2 cloves garlic, minced
- 2 tablespoons soy sauce
- 1 tablespoon sesame oil
- 1 tablespoon rice vinegar
- 1 teaspoon sugar
- 1/2 teaspoon white pepper
- 1/4 teaspoon red pepper flakes (optional)
- For Pan-Frying:
- 2 tablespoons vegetable oil (or canola oil)
- 1/2 cup water
- For Serving (Optional):
- Soy sauce
- Rice vinegar
- Sesame oil
- Chili oil
- Green onions, thinly sliced
Making the Potsticker Dough:
- Combine Dry Ingredients: In a large bowl, whisk together the flour and salt. This ensures the salt is evenly distributed throughout the dough.
- Add Hot Water: Gradually pour the hot water into the flour mixture while mixing with a wooden spoon or chopsticks. Be careful, as the water will be hot! Initially, the mixture will look shaggy.
- Knead the Dough: Once the dough has cooled enough to handle, turn it out onto a lightly floured surface. Knead the dough for about 8-10 minutes, or until it becomes smooth and elastic. The dough should be pliable and not too sticky. If it’s too sticky, add a little more flour, a tablespoon at a time. If it’s too dry, add a teaspoon of water at a time.
- Rest the Dough: Form the dough into a ball, wrap it tightly in plastic wrap, and let it rest at room temperature for at least 30 minutes, or up to an hour. This resting period allows the gluten to relax, making the dough easier to roll out and shape.
Preparing the Chicken Filling:
- Combine Ingredients: In a large bowl, combine the ground chicken, napa cabbage, green onions, ginger, garlic, soy sauce, sesame oil, rice vinegar, sugar, white pepper, and red pepper flakes (if using).
- Mix Thoroughly: Use your hands or a spoon to thoroughly mix all the ingredients together until well combined. Make sure the spices are evenly distributed throughout the chicken mixture.
- Test the Filling (Optional): To ensure the seasoning is to your liking, you can cook a small spoonful of the filling in a pan and taste it. Adjust the seasonings as needed.
Assembling the Potstickers:
- Divide the Dough: After the dough has rested, divide it in half. Keep one half wrapped in plastic wrap to prevent it from drying out while you work with the other half.
- Roll into a Rope: On a lightly floured surface, roll the dough into a long rope about 1 inch in diameter.
- Cut into Pieces: Cut the rope into small pieces, about 1 inch long each. These will be your individual potsticker wrappers. You should get around 20-25 pieces from each half of the dough.
- Roll out the Wrappers: Flatten each piece into a small disc. Using a rolling pin, roll out each disc into a thin, circular wrapper, about 3-4 inches in diameter. The edges should be slightly thinner than the center. You can use a potsticker press if you have one.
- Fill the Wrappers: Place about 1 tablespoon of the chicken filling in the center of each wrapper. Be careful not to overfill, as this will make it difficult to seal the potstickers.
- Seal the Potstickers: There are several ways to seal potstickers. Here’s one method:
- Dip your finger in water and lightly moisten the edges of the wrapper.
- Fold the wrapper in half to form a half-moon shape.
- Pinch the edges together to seal, starting from the center and working your way outwards.
- For a decorative crimp, pleat one side of the wrapper as you seal it. This involves making small folds along the edge and pressing them together to create a ruffled effect.
- Repeat: Repeat steps 4-6 until all the dough and filling are used. Place the assembled potstickers on a lightly floured baking sheet to prevent them from sticking.
Pan-Frying the Potstickers:
- Heat the Oil: Heat the vegetable oil in a large, non-stick skillet over medium-high heat. Make sure the skillet is large enough to accommodate all the potstickers in a single layer.
- Arrange Potstickers: Carefully arrange the potstickers in the skillet, flat-bottom side down. Don’t overcrowd the pan; work in batches if necessary.
- Sear the Bottoms: Cook the potstickers for about 2-3 minutes, or until the bottoms are golden brown and crispy. Keep a close eye on them to prevent burning.
- Add Water: Carefully pour the water into the skillet. The water will sizzle and create steam.
- Cover and Steam: Immediately cover the skillet with a lid. Reduce the heat to medium-low and let the potstickers steam for about 8-10 minutes, or until the water has evaporated and the potstickers are cooked through. The internal temperature of the chicken filling should reach 165°F (74°C).
- Check for Doneness: Remove the lid and check if the water has completely evaporated. If there’s still water in the pan, continue cooking uncovered until it’s gone.
- Crisp the Bottoms (Optional): If you want the bottoms of the potstickers to be extra crispy, increase the heat to medium-high for the last minute or two of cooking. Watch them carefully to prevent burning.
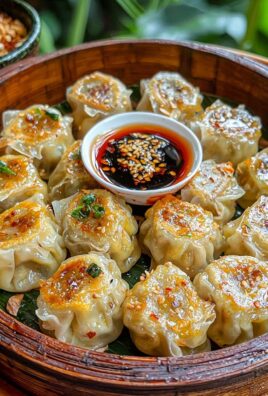
- Remove and Serve: Once the potstickers are cooked through and the bottoms are crispy, carefully remove them from the skillet with a spatula. Serve immediately with your favorite dipping sauce.
Serving Suggestions:
I love to serve these potstickers with a simple dipping sauce made from soy sauce, rice vinegar, sesame oil, and a touch of chili oil for some heat. You can also garnish them with thinly sliced green onions for a pop of color and freshness.
Enjoy your homemade Chicken Potstickers! They’re perfect as an appetizer, snack, or even a light meal.
Conclusion:
And there you have it! These pan-fried Chicken Potstickers are more than just a recipe; they’re a passport to a delicious and satisfying meal that’s surprisingly easy to create at home. I truly believe this recipe is a must-try for anyone who loves Asian cuisine or is simply looking for a fun and flavorful weeknight dinner. The combination of the savory chicken filling, the crispy golden-brown bottoms, and the tender, slightly chewy wrappers is simply irresistible.
But why is this recipe so special? It’s all about the balance. The filling is packed with umami, thanks to the soy sauce, ginger, and garlic, while the sesame oil adds a subtle nutty aroma that elevates the entire dish. The pan-frying technique ensures that the potstickers are perfectly cooked – crispy on the bottom, tender on top, and juicy inside. Plus, making them yourself allows you to control the ingredients and customize the flavors to your liking.
Ready to take your potsticker game to the next level? Here are a few serving suggestions and variations to get you started. First, don’t forget the dipping sauce! A simple mixture of soy sauce, rice vinegar, and a touch of chili oil is classic, but feel free to experiment with other flavors. A ginger-scallion sauce or a spicy peanut sauce would also be fantastic.
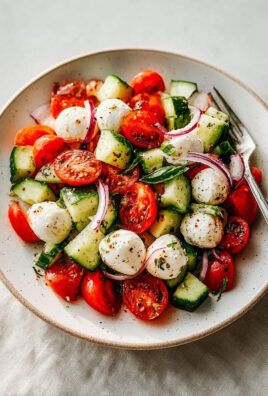
For a complete meal, serve these Chicken Potstickers alongside a fresh and vibrant Asian slaw or a bowl of steaming hot ramen. You could also add a side of stir-fried vegetables for a healthy and balanced dinner.
If you’re feeling adventurous, try experimenting with different fillings. Ground pork, shrimp, or even tofu would all be delicious alternatives to chicken. You could also add different vegetables to the filling, such as shredded cabbage, carrots, or mushrooms.
Another fun variation is to make these potstickers in the air fryer. Simply spray them with a little oil and cook them at 400°F for about 10-12 minutes, flipping them halfway through. They won’t be quite as crispy as the pan-fried version, but they’ll still be incredibly delicious and a bit healthier.
Don’t be intimidated by the thought of making potstickers from scratch. It’s actually a lot easier than you might think, and the results are well worth the effort. Plus, it’s a great activity to do with friends or family. Get everyone involved in the filling and folding process, and you’ll have a fun and memorable cooking experience.
I’m so confident that you’ll love this recipe that I urge you to give it a try. Once you’ve made your own Chicken Potstickers, you’ll never want to go back to store-bought ones again.
So, grab your ingredients, put on some music, and get ready to create some culinary magic. And most importantly, don’t forget to share your experience with me! I’d love to hear how your potstickers turned out, what variations you tried, and what dipping sauces you enjoyed. Leave a comment below or tag me on social media – I can’t wait to see your creations! Happy cooking!
Chicken Potstickers Pan Fried: Crispy Perfection at Home
Delicious homemade chicken potstickers with a savory filling, pan-fried to crispy perfection. Perfect as an appetizer, snack, or light meal!
Ingredients
- 3 cups all-purpose flour, plus more for dusting
- 1 cup hot water (not boiling, but very hot)
- 1/2 teaspoon salt
- 1 pound ground chicken
- 1 cup finely chopped napa cabbage
- 1/2 cup finely chopped green onions
- 1/4 cup finely grated ginger
- 2 cloves garlic, minced
- 2 tablespoons soy sauce
- 1 tablespoon sesame oil
- 1 tablespoon rice vinegar
- 1 teaspoon sugar
- 1/2 teaspoon white pepper
- 1/4 teaspoon red pepper flakes (optional)
- 2 tablespoons vegetable oil (or canola oil)
- 1/2 cup water
- Soy sauce
- Rice vinegar
- Sesame oil
- Chili oil
- Green onions, thinly sliced
Instructions
- In a large bowl, whisk together the flour and salt.
- Gradually pour the hot water into the flour mixture while mixing with a wooden spoon or chopsticks.
- Once the dough has cooled enough to handle, turn it out onto a lightly floured surface. Knead the dough for about 8-10 minutes, or until it becomes smooth and elastic. If it’s too sticky, add a little more flour, a tablespoon at a time. If it’s too dry, add a teaspoon of water at a time.
- Form the dough into a ball, wrap it tightly in plastic wrap, and let it rest at room temperature for at least 30 minutes, or up to an hour.
- In a large bowl, combine the ground chicken, napa cabbage, green onions, ginger, garlic, soy sauce, sesame oil, rice vinegar, sugar, white pepper, and red pepper flakes (if using).
- Use your hands or a spoon to thoroughly mix all the ingredients together until well combined.
- To ensure the seasoning is to your liking, you can cook a small spoonful of the filling in a pan and taste it. Adjust the seasonings as needed.
- After the dough has rested, divide it in half. Keep one half wrapped in plastic wrap to prevent it from drying out while you work with the other half.
- On a lightly floured surface, roll the dough into a long rope about 1 inch in diameter.
- Cut the rope into small pieces, about 1 inch long each.
- Flatten each piece into a small disc. Using a rolling pin, roll out each disc into a thin, circular wrapper, about 3-4 inches in diameter. The edges should be slightly thinner than the center.
- Place about 1 tablespoon of the chicken filling in the center of each wrapper.
- Dip your finger in water and lightly moisten the edges of the wrapper. Fold the wrapper in half to form a half-moon shape. Pinch the edges together to seal, starting from the center and working your way outwards. For a decorative crimp, pleat one side of the wrapper as you seal it.
- Repeat steps 4-6 until all the dough and filling are used. Place the assembled potstickers on a lightly floured baking sheet to prevent them from sticking.
- Heat the vegetable oil in a large, non-stick skillet over medium-high heat.
- Carefully arrange the potstickers in the skillet, flat-bottom side down. Don’t overcrowd the pan; work in batches if necessary.
- Cook the potstickers for about 2-3 minutes, or until the bottoms are golden brown and crispy.
- Carefully pour the water into the skillet.
- Immediately cover the skillet with a lid. Reduce the heat to medium-low and let the potstickers steam for about 8-10 minutes, or until the water has evaporated and the potstickers are cooked through. The internal temperature of the chicken filling should reach 165°F (74°C).
- Remove the lid and check if the water has completely evaporated. If there’s still water in the pan, continue cooking uncovered until it’s gone.
- If you want the bottoms of the potstickers to be extra crispy, increase the heat to medium-high for the last minute or two of cooking.
- Once the potstickers are cooked through and the bottoms are crispy, carefully remove them from the skillet with a spatula. Serve immediately with your favorite dipping sauce.
Notes
- Resting the dough is crucial for a tender wrapper. Don’t skip this step!
- Be careful not to overfill the potstickers, or they will be difficult to seal.
- You can freeze assembled potstickers on a baking sheet. Once frozen, transfer them to a freezer bag. Cook from frozen, adding a few extra minutes to the steaming time.
- For a dipping sauce, combine soy sauce, rice vinegar, sesame oil, and chili oil to taste. Garnish with green onions.
Leave a Comment