
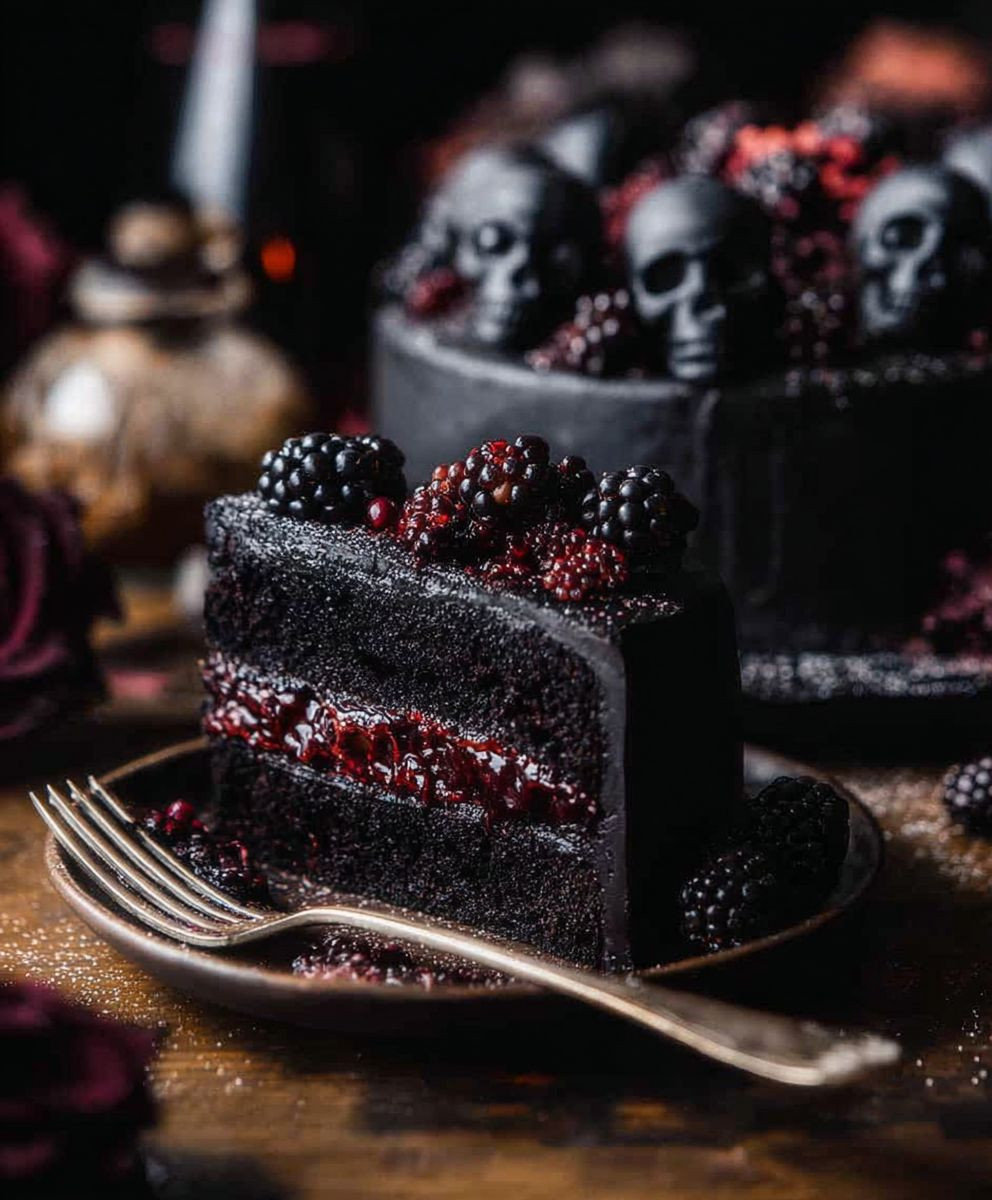
Black Velvet Halloween Cake: Prepare to be bewitched by this show-stopping dessert! Imagine slicing into a cake so dark and decadent, it practically screams Halloween. This isn’t just any cake; it’s a conversation starter, a centerpiece, and a guaranteed crowd-pleaser all rolled into one deliciously spooky package.
While the exact origins of the “velvet” cake texture are debated, it’s generally believed to have evolved from 19th-century cakes that used cocoa powder to create a finer crumb. The addition of buttermilk and vinegar (or in this case, black cocoa!) further tenderizes the cake, resulting in that signature velvety texture we all adore. For Halloween, we’re taking that classic concept and giving it a gothic twist with deep black coloring and spooky decorations.
What makes this Black Velvet Halloween Cake so irresistible? It’s the perfect combination of rich chocolate flavor, a melt-in-your-mouth texture, and the sheer fun of creating a truly memorable Halloween treat. The deep, dark color is visually stunning, and the moist, tender crumb is simply divine. Whether you’re hosting a Halloween party or just want to indulge in a festive dessert, this cake is sure to impress. Plus, it’s surprisingly easy to make, so you can spend less time in the kitchen and more time enjoying the spooky season!

Ingredients:
- For the Cake:
- 2 ½ cups all-purpose flour
- ¾ cup unsweetened cocoa powder (Dutch-processed preferred)
- 1 ½ teaspoons baking soda
- 1 teaspoon baking powder
- 1 teaspoon salt
- 1 ½ cups granulated sugar
- ¾ cup (1 ½ sticks) unsalted butter, softened
- 3 large eggs
- 1 ½ cups buttermilk
- 1 ½ teaspoons vanilla extract
- 1 tablespoon black gel food coloring (or more, to achieve desired color)
- 1 cup hot brewed coffee
- For the Cream Cheese Frosting:
- 8 ounces cream cheese, softened
- ½ cup (1 stick) unsalted butter, softened
- 4 cups powdered sugar
- 1 teaspoon vanilla extract
- Pinch of salt
- Optional: Black sprinkles or edible glitter for decoration
- For the Chocolate Ganache Drip (Optional):
- 4 ounces semi-sweet chocolate, finely chopped
- ½ cup heavy cream
Preparing the Black Velvet Cake
- Preheat and Prep: First things first, let’s get our oven ready. Preheat it to 350°F (175°C). Grease and flour two 9-inch round cake pans. I like to use baking spray with flour already in it for extra insurance against sticking. You can also line the bottoms with parchment paper rounds for easy removal.
- Dry Ingredients: In a large bowl, whisk together the flour, cocoa powder, baking soda, baking powder, and salt. Make sure everything is well combined. This ensures even distribution of the leavening agents, which is crucial for a light and fluffy cake.
- Cream Butter and Sugar: In a separate large bowl (or the bowl of your stand mixer), cream together the softened butter and granulated sugar until light and fluffy. This usually takes about 3-5 minutes. Don’t rush this step! Incorporating air into the butter and sugar is key to a tender cake.
- Add Eggs: Beat in the eggs one at a time, mixing well after each addition. Make sure each egg is fully incorporated before adding the next. This helps prevent curdling and ensures a smooth batter.
- Combine Wet and Dry Ingredients: Gradually add the dry ingredients to the wet ingredients, alternating with the buttermilk, beginning and ending with the dry ingredients. I usually do this in three additions. So, add about a third of the dry ingredients, then half of the buttermilk, then another third of the dry ingredients, the remaining buttermilk, and finally the last of the dry ingredients. Mix until just combined. Be careful not to overmix! Overmixing develops the gluten in the flour, resulting in a tough cake.
- Add Vanilla and Food Coloring: Stir in the vanilla extract and black gel food coloring. Add more food coloring if needed to achieve your desired shade of black. Remember that the color will deepen slightly as the cake bakes.
- Add Hot Coffee: Slowly pour in the hot brewed coffee and mix until just combined. The hot coffee helps to bloom the cocoa powder, intensifying its flavor and color. It also adds moisture to the cake. The batter will be quite thin, but don’t worry, that’s normal!
- Divide and Bake: Divide the batter evenly between the prepared cake pans. Bake for 30-35 minutes, or until a toothpick inserted into the center comes out clean or with a few moist crumbs.
- Cool Completely: Let the cakes cool in the pans for 10 minutes before inverting them onto a wire rack to cool completely. Make sure the cakes are completely cool before frosting. This prevents the frosting from melting and sliding off.
Making the Cream Cheese Frosting
- Cream Cheese and Butter: In a large bowl (or the bowl of your stand mixer), beat together the softened cream cheese and butter until smooth and creamy. Make sure both the cream cheese and butter are at room temperature for the best results. This will prevent lumps in your frosting.
- Add Powdered Sugar: Gradually add the powdered sugar, one cup at a time, beating on low speed until combined. Be careful not to add the powdered sugar too quickly, or it will create a cloud of dust!
- Add Vanilla and Salt: Stir in the vanilla extract and salt. Beat on medium speed until light and fluffy.
- Adjust Consistency: If the frosting is too thick, add a tablespoon of milk or cream at a time until you reach your desired consistency. If it’s too thin, add a little more powdered sugar.
Assembling the Cake
- Level the Cakes (Optional): If your cakes have a dome on top, use a serrated knife to level them. This will make it easier to stack and frost the cake evenly.
- First Layer: Place one cake layer on a serving plate or cake stand.
- Frosting: Spread a generous layer of cream cheese frosting over the first cake layer.
- Second Layer: Carefully place the second cake layer on top of the frosting.
- Crumb Coat: Apply a thin layer of frosting over the entire cake. This is called a crumb coat, and it helps to seal in any loose crumbs. Refrigerate the cake for 30 minutes to allow the crumb coat to set.
- Final Frosting: Apply a final, thicker layer of frosting over the entire cake. Smooth the frosting with an offset spatula or knife. You can create swirls or other decorative patterns if you like.
- Chill: Refrigerate the frosted cake for at least 30 minutes to allow the frosting to set.
Optional Chocolate Ganache Drip
- Chop Chocolate: Finely chop the semi-sweet chocolate and place it in a heatproof bowl.
- Heat Cream: Heat the heavy cream in a small saucepan over medium heat until it just begins to simmer. Do not boil!
- Pour Over Chocolate: Pour the hot cream over the chopped chocolate.
- Let Sit: Let the mixture sit for 1 minute to allow the chocolate to melt.
- Stir: Gently stir the mixture until smooth and glossy.
- Cool Slightly: Let the ganache cool slightly until it thickens to a pourable consistency. This usually takes about 5-10 minutes.
- Drip: Spoon the ganache around the edge of the cake, allowing it to drip down the sides. You can use a spoon or a piping bag to control the drips.
- Spread: Spread the remaining ganache over the top of the cake.
- Chill: Refrigerate the cake for at least 30 minutes to allow the ganache to set.
Decorating the Cake
- Sprinkles: While the frosting or ganache is still slightly wet, sprinkle black sprinkles or edible glitter over the cake.
- Other Decorations: Get creative! You can add other Halloween-themed decorations, such as candy eyeballs, gummy worms, or fondant decorations.
Tips and Tricks for the Perfect Black Velvet Cake
- Use Dutch-Processed Cocoa Powder: Dutch-processed cocoa powder has a darker color and a milder flavor than natural cocoa powder. It also reacts differently with baking soda, resulting in a more tender cake.
- Don’t Overmix the Batter: Overmixing develops the gluten in the flour, resulting in a tough cake. Mix until just combined.
- Use Room Temperature Ingredients: Using room temperature ingredients helps to create a smooth and emulsified batter, which results in a more tender cake.
- Cool the Cakes Completely: Make sure the cakes are completely cool before frosting. This prevents the frosting from melting and sliding off.
- Chill the Cake: Chilling the cake after frosting helps the frosting to set and makes it easier to slice.
- Adjust the Black Food Coloring: The amount of black food coloring you need will depend on the brand and intensity of the coloring. Start with 1 tablespoon and add more until you achieve your desired shade of black. Be careful not to add too much, as it can affect the taste of the cake. Gel food coloring is recommended over liquid food coloring, as it is more concentrated and won’t thin out the batter.
- Coffee Substitute: If you don’t want to use coffee, you can substitute it with hot water. However, the coffee does enhance the chocolate flavor, so I highly recommend using it if you can.
- Buttermilk Substitute:
Conclusion:
So, there you have it! This Black Velvet Halloween Cake isn’t just a dessert; it’s a showstopper, a conversation starter, and a delicious experience all rolled into one spooky-chic package. I truly believe this recipe is a must-try for anyone looking to elevate their Halloween celebrations or simply impress their friends and family with a stunning and flavorful creation. The deep, dark color, the moist crumb, and the contrasting sweetness of the cream cheese frosting create a symphony of flavors and textures that will leave everyone wanting more.
But why is this cake so special? It’s more than just a pretty face. The combination of cocoa powder and buttermilk creates a uniquely tender and flavorful cake that’s far from your average chocolate bake. The cream cheese frosting adds a tangy sweetness that perfectly complements the richness of the cake, and the black velvet effect is achieved without any artificial colors – just pure cocoa magic! It’s a recipe that’s both impressive and surprisingly easy to execute, making it perfect for bakers of all skill levels.
This Black Velvet Halloween Cake is a guaranteed crowd-pleaser.
Now, let’s talk about serving suggestions and variations! While this cake is absolutely divine as is, there are plenty of ways to customize it to your liking. For a more intense chocolate flavor, you could add a tablespoon of instant espresso powder to the batter. If you’re feeling adventurous, try incorporating a layer of raspberry jam between the cake layers for a burst of fruity tartness.
For a truly spooky presentation, consider adding edible glitter or black sanding sugar to the frosting. You could also create a spiderweb design on top using melted chocolate or a simple piping bag. And if you’re short on time, you can always use store-bought cream cheese frosting and simply tint it black with food coloring.
Serving-wise, this cake pairs perfectly with a scoop of vanilla ice cream or a dollop of whipped cream. A cup of hot coffee or tea is also a wonderful accompaniment. And for a truly festive touch, serve it alongside a Halloween-themed cocktail or mocktail.
But the most important thing is to have fun with it! Don’t be afraid to experiment with different flavors and decorations to create a cake that’s uniquely yours. Baking should be an enjoyable experience, so relax, put on some spooky tunes, and let your creativity flow.
I’m so excited for you to try this recipe and experience the magic of this Black Velvet Halloween Cake for yourself. I’ve poured my heart and soul into creating a recipe that’s both delicious and visually stunning, and I truly believe it will become a Halloween tradition in your household.
So, what are you waiting for? Grab your ingredients, preheat your oven, and get ready to bake! And when you do, please, please, please share your creations with me! I would absolutely love to see your photos and hear about your experiences. You can tag me on social media using [Your Social Media Handle] or leave a comment below. I can’t wait to see your spooky masterpieces! Happy baking, and Happy Halloween! Let me know if you have any questions, I’m here to help. I hope you enjoy this recipe as much as I do!
Black Velvet Halloween Cake: A Spooky & Delicious Recipe
A stunning Black Velvet Cake with cream cheese frosting and optional chocolate ganache drip. Perfect for Halloween or any occasion where you want a dramatic and decadent dessert!
Ingredients
- 2 ½ cups all-purpose flour
- ¾ cup unsweetened cocoa powder (Dutch-processed preferred)
- 1 ½ teaspoons baking soda
- 1 teaspoon baking powder
- 1 teaspoon salt
- 1 ½ cups granulated sugar
- ¾ cup (1 ½ sticks) unsalted butter, softened
- 3 large eggs
- 1 ½ cups buttermilk
- 1 ½ teaspoons vanilla extract
- 1 tablespoon black gel food coloring (or more, to achieve desired color)
- 1 cup hot brewed coffee
- 8 ounces cream cheese, softened
- ½ cup (1 stick) unsalted butter, softened
- 4 cups powdered sugar
- 1 teaspoon vanilla extract
- Pinch of salt
- Optional: Black sprinkles or edible glitter for decoration
- 4 ounces semi-sweet chocolate, finely chopped
- ½ cup heavy cream
Instructions
- Preheat oven to 350°F (175°C). Grease and flour two 9-inch round cake pans. Line the bottoms with parchment paper rounds.
- In a large bowl, whisk together the flour, cocoa powder, baking soda, baking powder, and salt.
- In a separate large bowl (or stand mixer), cream together the softened butter and granulated sugar until light and fluffy (3-5 minutes).
- Beat in the eggs one at a time, mixing well after each addition.
- Gradually add the dry ingredients to the wet ingredients, alternating with the buttermilk, beginning and ending with the dry ingredients. Mix until just combined.
- Stir in the vanilla extract and black gel food coloring. Add more food coloring if needed to achieve your desired shade of black.
- Slowly pour in the hot brewed coffee and mix until just combined. The batter will be quite thin.
- Divide the batter evenly between the prepared cake pans. Bake for 30-35 minutes, or until a toothpick inserted into the center comes out clean or with a few moist crumbs.
- Let the cakes cool in the pans for 10 minutes before inverting them onto a wire rack to cool completely.
- In a large bowl (or stand mixer), beat together the softened cream cheese and butter until smooth and creamy.
- Gradually add the powdered sugar, one cup at a time, beating on low speed until combined.
- Stir in the vanilla extract and salt. Beat on medium speed until light and fluffy.
- If the frosting is too thick, add a tablespoon of milk or cream at a time until you reach your desired consistency. If it’s too thin, add a little more powdered sugar.
- If your cakes have a dome on top, use a serrated knife to level them.
- Place one cake layer on a serving plate or cake stand.
- Spread a generous layer of cream cheese frosting over the first cake layer.
- Carefully place the second cake layer on top of the frosting.
- Apply a thin layer of frosting over the entire cake. Refrigerate the cake for 30 minutes to allow the crumb coat to set.
- Apply a final, thicker layer of frosting over the entire cake. Smooth the frosting with an offset spatula or knife.
- Refrigerate the frosted cake for at least 30 minutes to allow the frosting to set.
- Finely chop the semi-sweet chocolate and place it in a heatproof bowl.
- Heat the heavy cream in a small saucepan over medium heat until it just begins to simmer. Do not boil!
- Pour the hot cream over the chopped chocolate.
- Let the mixture sit for 1 minute to allow the chocolate to melt.
- Gently stir the mixture until smooth and glossy.
- Let the ganache cool slightly until it thickens to a pourable consistency (5-10 minutes).
- Spoon the ganache around the edge of the cake, allowing it to drip down the sides.
- Spread the remaining ganache over the top of the cake.
- Refrigerate the cake for at least 30 minutes to allow the ganache to set.
- While the frosting or ganache is still slightly wet, sprinkle black sprinkles or edible glitter over the cake.
- Get creative! You can add other Halloween-themed decorations, such as candy eyeballs, gummy worms, or fondant decorations.
Notes
- Use Dutch-processed cocoa powder for a darker color and milder flavor.
- Don’t Overmix: Overmixing leads to a tough cake.
- Use room temperature ingredients for a smooth batter.
- Ensure cakes are completely cool before frosting.
- Chilling helps the frosting set and makes slicing easier.
- Add black gel food coloring gradually to achieve the desired shade.
- If you don’t want to use coffee, you can substitute it with hot water. However, the coffee does enhance the chocolate flavor, so I highly recommend using it if you can.
- If you don’t have buttermilk, you can make a substitute by adding 1 ½ tablespoons of lemon juice or white vinegar to a liquid measuring cup. Then, add enough milk to reach the 1 ½ cup mark. Stir and let sit for 5 minutes before using.
Leave a Comment