
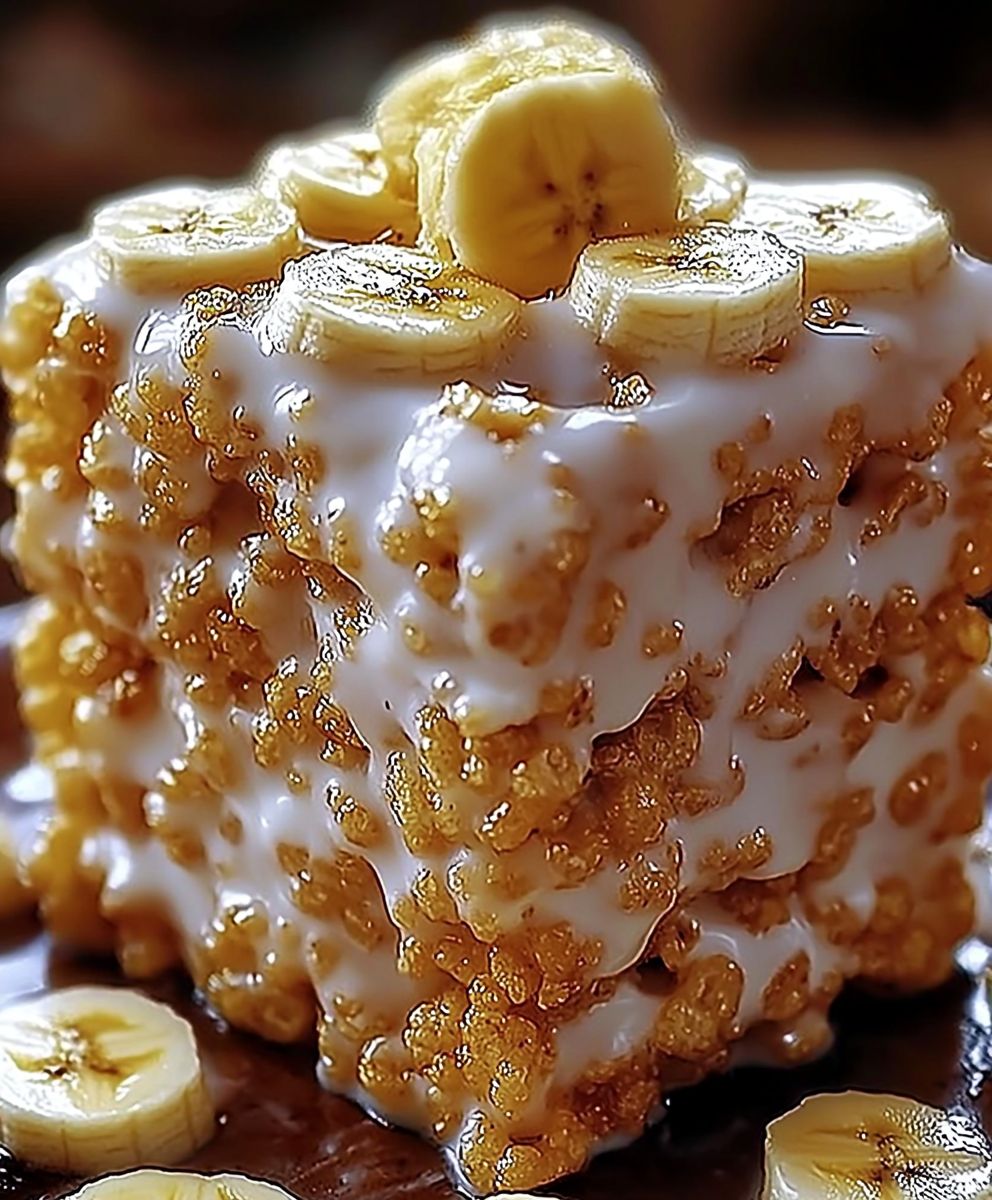
Banana Pudding Krispie Treats: Prepare to have your taste buds transported to a realm of pure bliss! Imagine the comforting nostalgia of classic rice krispie treats, elevated to a whole new level with the creamy, dreamy flavor of banana pudding. This isn’t just a dessert; it’s a delightful fusion of textures and tastes that will have everyone begging for more.
Banana pudding, a Southern staple, has a rich history rooted in resourcefulness and simple pleasures. Often made with vanilla wafers, fresh bananas, and a luscious custard, it’s a dessert that evokes memories of family gatherings and warm hospitality. We’ve taken that beloved flavor profile and reimagined it in a fun, portable, and utterly irresistible treat.
What makes Banana Pudding Krispie Treats so special? It’s the perfect combination of crunchy, chewy, and creamy. The crispy rice cereal provides a satisfying bite, while the banana pudding flavor infuses every morsel with a sweet, tropical essence. Plus, they’re incredibly easy to make, requiring minimal ingredients and effort. Whether you’re looking for a quick after-school snack, a crowd-pleasing party dessert, or simply a sweet escape, these treats are guaranteed to hit the spot. Get ready to experience a taste of sunshine with every bite!

Ingredients:
- 4 tablespoons unsalted butter
- 1 (10-ounce) package marshmallows
- 6 cups Rice Krispies cereal
- 1 (3.4-ounce) package instant banana cream pudding mix
- 1/2 cup milk
- 1/2 cup heavy cream
- 1 teaspoon vanilla extract
- 1/4 teaspoon ground nutmeg
- 1 cup crushed vanilla wafers, for topping
- Sliced bananas, for garnish (optional)
Preparing the Banana Pudding Mixture:
- First, let’s get that delicious banana pudding flavor going! In a medium-sized bowl, whisk together the instant banana cream pudding mix and the milk until smooth. Don’t worry if it seems a little thin at first; it will thicken as it sits.
- Next, gently fold in the heavy cream. This will add richness and a wonderful creamy texture to our treats. Make sure you don’t overmix; we want to keep the mixture light and airy.
- Now, stir in the vanilla extract and ground nutmeg. The vanilla enhances the banana flavor, and the nutmeg adds a warm, subtle spice that complements everything perfectly. Trust me on this one – it’s a game changer!
- Cover the bowl with plastic wrap and place it in the refrigerator. We want this mixture to chill for at least 30 minutes, or even better, an hour. This will allow the pudding to fully set and the flavors to meld together beautifully. This step is crucial for achieving that authentic banana pudding taste.
Making the Krispie Treat Base:
- While the banana pudding mixture is chilling, let’s move on to the Krispie treat base. Grab a large saucepan and melt the butter over medium heat. Keep a close eye on it, as we don’t want it to burn.
- Once the butter is completely melted, add the marshmallows to the saucepan. Stir constantly until the marshmallows are completely melted and smooth. This might take a few minutes, so be patient and keep stirring to prevent sticking. The melted marshmallow mixture should be glossy and stretchy.
- Remove the saucepan from the heat. This is important because we don’t want the cereal to get soggy.
- Now, pour the Rice Krispies cereal into the melted marshmallow mixture. Gently fold the cereal into the marshmallows until it’s evenly coated. Be careful not to crush the cereal; we want to maintain its crispy texture. This step requires a bit of elbow grease, but it’s worth it!
Combining and Assembling the Treats:
- Take the chilled banana pudding mixture out of the refrigerator. It should be nice and thick now.
- Gently fold the banana pudding mixture into the Rice Krispies mixture. Again, be careful not to overmix. We want to distribute the banana pudding flavor throughout the treats without making them too dense. The mixture will be a little sticky, but that’s perfectly normal.
- Prepare your pan. I recommend using a 9×13 inch baking pan. Lightly grease the pan with butter or cooking spray to prevent the treats from sticking. You can also line the pan with parchment paper, leaving an overhang on the sides, for easy removal.
- Pour the Rice Krispies and banana pudding mixture into the prepared pan. Use a spatula or your hands (lightly greased) to evenly spread the mixture and gently press it down into the pan. Don’t press too hard, or the treats will become too dense. We want them to be slightly soft and chewy.
- Sprinkle the crushed vanilla wafers evenly over the top of the treats. Gently press the wafers into the surface so they adhere to the mixture. This adds a wonderful textural contrast and enhances the banana pudding flavor.
Chilling and Cutting:
- Cover the pan with plastic wrap and place it in the refrigerator to chill for at least 2 hours, or preferably overnight. This will allow the treats to fully set and the flavors to meld together even more. Patience is key here!
- Once the treats are firm, remove them from the refrigerator. If you lined the pan with parchment paper, simply lift the treats out using the overhang. Otherwise, carefully cut around the edges of the pan to loosen the treats.
- Cut the treats into squares or rectangles using a sharp knife. The size of the pieces is up to you! I usually go for about 2-inch squares.
- If desired, garnish the treats with sliced bananas just before serving. This adds a fresh and vibrant touch.
Tips and Variations:
- Marshmallow Tips: For the best results, use fresh marshmallows. Stale marshmallows don’t melt as smoothly.
- Cereal Options: While Rice Krispies are the classic choice, you can experiment with other cereals like Cocoa Krispies or Fruity Pebbles for a fun twist.
- Nut Butter Addition: For an extra layer of flavor, try adding a tablespoon or two of peanut butter or almond butter to the melted marshmallow mixture.
- Chocolate Chips: Fold in 1/2 cup of chocolate chips (milk, dark, or white) to the Rice Krispies mixture for a decadent treat.
- Toasted Coconut: Sprinkle toasted coconut over the top of the treats along with the vanilla wafers for added texture and flavor.
- Storage: Store the Banana Pudding Krispie Treats in an airtight container at room temperature for up to 3 days. They are best enjoyed fresh.
- Make Ahead: You can make these treats a day or two in advance. Just store them in an airtight container in the refrigerator.
- Serving Suggestions: These treats are perfect for parties, potlucks, or a simple afternoon snack. They also make a great addition to lunchboxes.
Troubleshooting:
- Treats are too hard: You may have pressed the mixture too firmly into the pan. Next time, use a lighter touch.
- Treats are too sticky: You may have added too much banana pudding mixture. Be sure to measure the ingredients accurately.
- Treats are not holding their shape: The mixture may not have been chilled long enough. Allow the treats to chill for at least 2 hours, or preferably overnight.
Enjoy!
I hope you love these Banana Pudding Krispie Treats as much as I do! They’re a fun and delicious twist on a classic dessert.
Conclusion:
Okay, friends, let’s be honest – you’ve scrolled this far because something about Banana Pudding Krispie Treats just screamed “delicious,” right? And trust me, you weren’t wrong! This isn’t just another dessert recipe; it’s a nostalgic hug in every single bite. The creamy, dreamy banana pudding flavor perfectly complements the satisfying crunch of the Rice Krispies, creating a symphony of textures and tastes that will have everyone begging for more.
But why is this a must-try? Because it’s ridiculously easy! Seriously, even if you’re kitchen-challenged, you can nail this recipe. It requires minimal ingredients, comes together in minutes, and needs no baking. That’s right, no oven required! Plus, it’s a guaranteed crowd-pleaser. From kids’ birthday parties to potlucks with friends, these treats are always a hit. They’re the perfect balance of fun, flavor, and convenience.
And the best part? You can totally customize them to your liking! Feeling adventurous? Try adding a layer of sliced bananas between the Krispie mixture and the pudding. Or, for an extra touch of decadence, drizzle melted chocolate over the top. You could even sprinkle some crushed vanilla wafers on top for that authentic banana pudding vibe. For a more grown-up version, a splash of rum extract in the pudding adds a delightful kick. Get creative and make it your own!
Here are a few serving suggestions to elevate your Banana Pudding Krispie Treats experience:
* Individual Cups: Cut the treats into small squares and layer them with banana pudding in individual cups for an elegant presentation.
* Ice Cream Topping: Crumble the treats over vanilla ice cream for a delightful dessert sundae.
* Party Platter: Arrange the treats on a platter with fresh fruit and other desserts for a stunning spread.
* Lunchbox Treat: Individually wrap the treats for a fun and easy lunchbox surprise.
* Gifting: Package the treats in a decorative box or bag for a thoughtful homemade gift.
I’m telling you, these Banana Pudding Krispie Treats are about to become your new go-to dessert. They’re the perfect solution for those moments when you need a quick, easy, and utterly delicious treat.
So, what are you waiting for? Gather your ingredients, put on some music, and get ready to whip up a batch of these irresistible treats. I promise you won’t regret it!
And once you’ve made them (and devoured them, let’s be real), I want to hear all about it! Share your photos, your variations, and your experiences in the comments below. Did you add chocolate? Did you try the rum extract? Did your kids love them? I’m genuinely excited to see what you create and how you make this recipe your own. Let’s spread the banana pudding Krispie treat love! Happy baking (or rather, no-baking)! I can’t wait to hear from you!
Banana Pudding Krispie Treats: A Delicious & Easy Dessert Recipe
Crispy Rice Krispie treats meet creamy banana pudding, topped with vanilla wafers for a fun and delightful dessert.
Ingredients
- 4 tablespoons unsalted butter
- 1 (10-ounce) package marshmallows
- 6 cups Rice Krispies cereal
- 1 (3.4-ounce) package instant banana cream pudding mix
- 1/2 cup milk
- 1/2 cup heavy cream
- 1 teaspoon vanilla extract
- 1/4 teaspoon ground nutmeg
- 1 cup crushed vanilla wafers, for topping
- Sliced bananas, for garnish (optional)
Instructions
- In a medium-sized bowl, whisk together the instant banana cream pudding mix and the milk until smooth.
- Gently fold in the heavy cream.
- Stir in the vanilla extract and ground nutmeg.
- Cover the bowl with plastic wrap and refrigerate for at least 30 minutes, or up to an hour.
- In a large saucepan, melt the butter over medium heat.
- Add the marshmallows and stir constantly until completely melted and smooth.
- Remove the saucepan from the heat.
- Pour the Rice Krispies cereal into the melted marshmallow mixture. Gently fold the cereal into the marshmallows until evenly coated.
- Take the chilled banana pudding mixture out of the refrigerator.
- Gently fold the banana pudding mixture into the Rice Krispies mixture.
- Lightly grease a 9×13 inch baking pan with butter or cooking spray (or line with parchment paper).
- Pour the Rice Krispies and banana pudding mixture into the prepared pan. Use a spatula or your hands (lightly greased) to evenly spread the mixture and gently press it down into the pan.
- Sprinkle the crushed vanilla wafers evenly over the top of the treats. Gently press the wafers into the surface.
- Cover the pan with plastic wrap and refrigerate to chill for at least 2 hours, or preferably overnight.
- Once the treats are firm, remove them from the refrigerator.
- Cut the treats into squares or rectangles.
- If desired, garnish the treats with sliced bananas just before serving.
Notes
- For the best results, use fresh marshmallows.
- Store the Banana Pudding Krispie Treats in an airtight container at room temperature for up to 3 days. They are best enjoyed fresh.
- You can make these treats a day or two in advance. Just store them in an airtight container in the refrigerator.
- Marshmallow Tips: Stale marshmallows don’t melt as smoothly.
- Cereal Options: While Rice Krispies are the classic choice, you can experiment with other cereals like Cocoa Krispies or Fruity Pebbles for a fun twist.
- Nut Butter Addition: For an extra layer of flavor, try adding a tablespoon or two of peanut butter or almond butter to the melted marshmallow mixture.
- Chocolate Chips: Fold in 1/2 cup of chocolate chips (milk, dark, or white) to the Rice Krispies mixture for a decadent treat.
- Toasted Coconut: Sprinkle toasted coconut over the top of the treats along with the vanilla wafers for added texture and flavor.
Leave a Comment