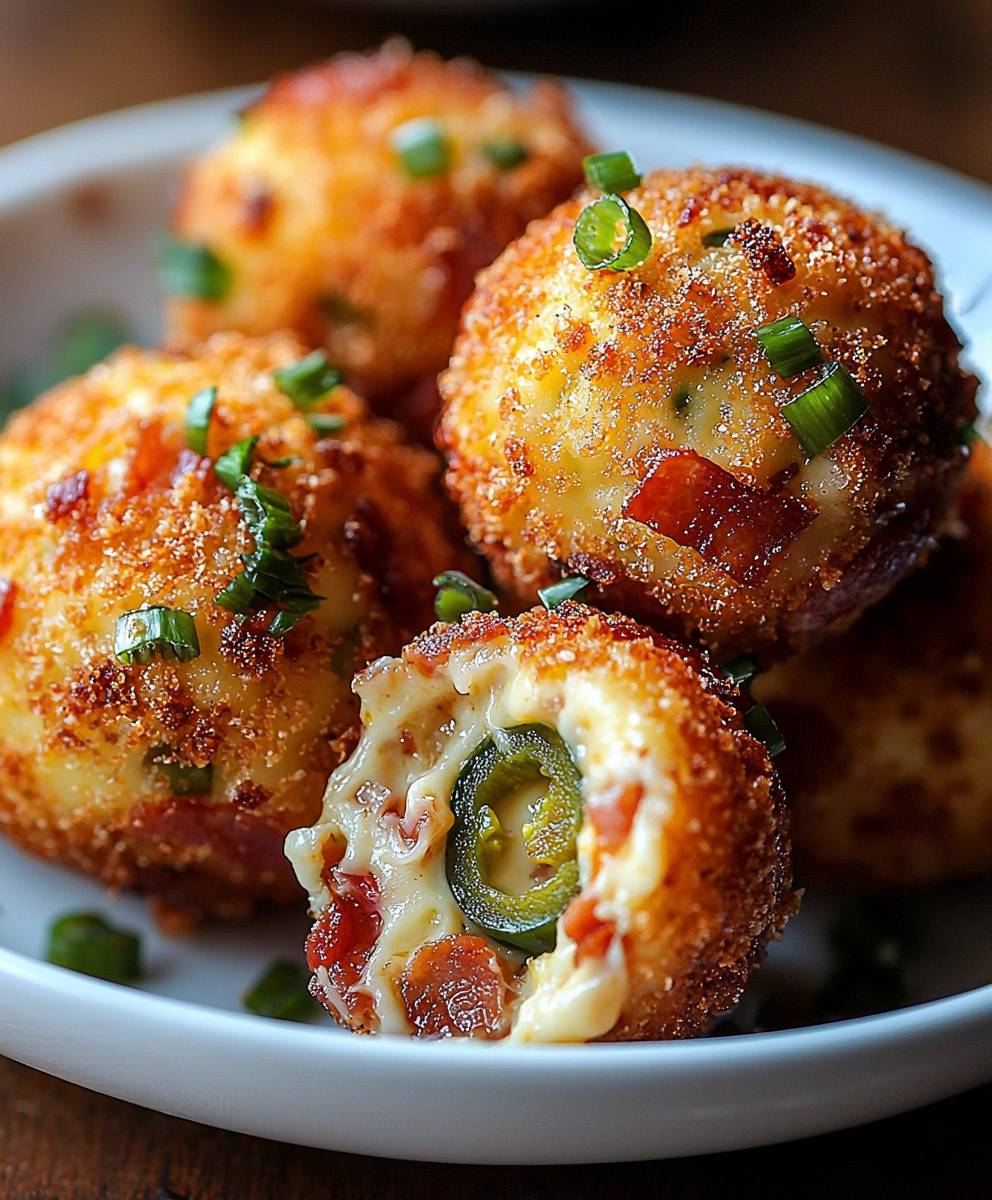
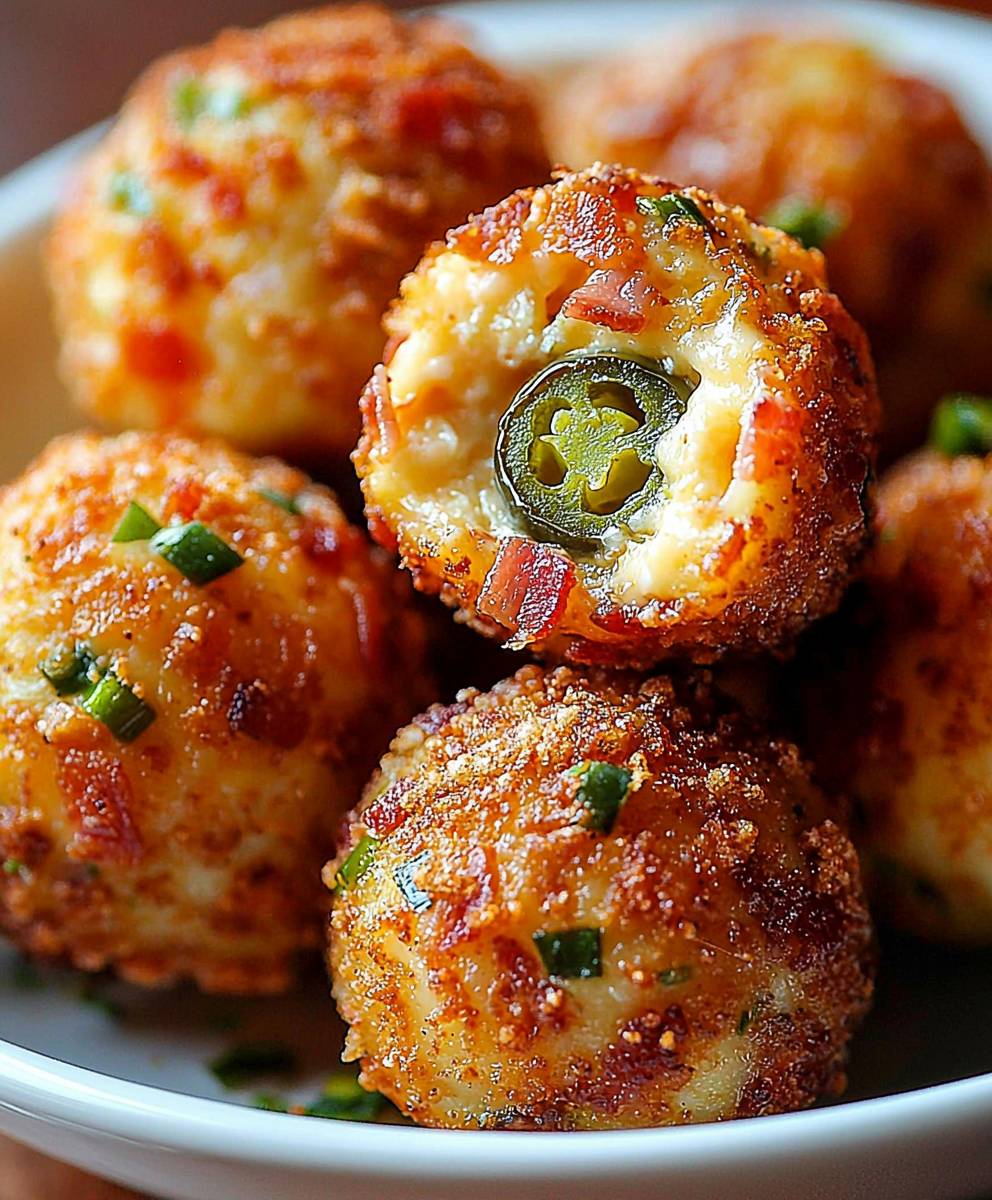
Bacon Jalapeno Popper Cheese Balls: Get ready to ignite your taste buds with these irresistible bites of cheesy, spicy, and smoky goodness! Imagine the creamy, tangy delight of a classic jalapeno popper, transformed into a perfectly portable and utterly addictive cheese ball. These aren’t just appetizers; they’re a flavor explosion waiting to happen at your next party, game day gathering, or even a cozy night in.
While the exact origins of the jalapeno popper are debated, its popularity soared in the United States during the late 20th century, quickly becoming a staple in bars and restaurants. The combination of spicy peppers, creamy cheese, and often bacon, proved to be an irresistible trifecta. We’ve taken that beloved concept and elevated it to a new level of shareable deliciousness with these Bacon Jalapeno Popper Cheese Balls.
What makes these cheese balls so universally loved? It’s the perfect balance of textures and tastes. The creamy, smooth cheese filling is punctuated by the fiery kick of jalapenos and the salty, crispy crunch of bacon. They’re incredibly easy to make, requiring minimal effort for maximum flavor impact. Plus, they’re a guaranteed crowd-pleaser, disappearing in minutes wherever they’re served. So, ditch the same old snacks and prepare to wow your friends and family with these unforgettable, bite-sized sensations!
Ingredients:
- 16 oz Cream Cheese, softened
- 1 cup Sharp Cheddar Cheese, shredded
- 1 cup Monterey Jack Cheese, shredded
- 1/2 cup Pepper Jack Cheese, shredded
- 1/2 cup Parmesan Cheese, grated
- 1/2 cup Cooked Bacon, crumbled (about 6 slices)
- 1/4 cup Pickled Jalapeños, finely diced (adjust to taste)
- 1 tbsp Jalapeño Juice (from the jar)
- 1 tsp Garlic Powder
- 1/2 tsp Onion Powder
- 1/4 tsp Smoked Paprika
- Pinch of Cayenne Pepper (optional)
- 1 cup All-Purpose Flour
- 2 large Eggs, beaten
- 2 cups Panko Bread Crumbs
- 1 cup Vegetable Oil, for frying
- Optional: Ranch Dressing or Blue Cheese Dressing, for dipping
Preparing the Cheese Ball Mixture:
Alright, let’s get started! First things first, we need to create the heart of our Bacon Jalapeno Popper Cheese Balls – the cheesy, spicy mixture that makes them so irresistible. This part is super easy, just make sure your cream cheese is nice and soft so everything blends together smoothly.
- In a large mixing bowl, combine the softened cream cheese, shredded cheddar cheese, shredded Monterey Jack cheese, shredded Pepper Jack cheese, and grated Parmesan cheese. Make sure the cream cheese is properly softened! This will prevent lumps and ensure a creamy, even mixture.
- Add the crumbled cooked bacon, diced pickled jalapeños, jalapeño juice, garlic powder, onion powder, smoked paprika, and cayenne pepper (if using). I like to use a hand mixer for this step, but you can definitely do it by hand with a sturdy spoon. Just be prepared to put in a little elbow grease!
- Mix all the ingredients together until they are thoroughly combined and the mixture is smooth and uniform. Taste the mixture and adjust the seasoning as needed. If you want it spicier, add more jalapeños or cayenne pepper. If you want it cheesier, add more cheddar or Monterey Jack. This is your chance to customize it to your liking!
- Cover the bowl with plastic wrap and refrigerate for at least 30 minutes, or up to 2 hours. This chilling time is crucial! It allows the cheese mixture to firm up, making it much easier to roll into balls. Trust me, you don’t want to skip this step.
Forming the Cheese Balls:
Now that our cheese mixture is nice and firm, it’s time to roll it into those perfect little balls of cheesy goodness. This can get a little messy, but it’s all part of the fun!
- Remove the cheese mixture from the refrigerator. Line a baking sheet with parchment paper or wax paper. This will prevent the cheese balls from sticking.
- Using a small cookie scoop or a spoon, scoop out about 1-2 tablespoons of the cheese mixture. Roll it between your palms to form a ball. Don’t worry if they’re not perfectly round; a little imperfection adds character!
- Place the cheese ball on the prepared baking sheet. Repeat with the remaining cheese mixture, spacing the cheese balls evenly apart.
- Once all the cheese balls are formed, place the baking sheet in the freezer for at least 30 minutes. This will help them hold their shape during the breading and frying process. Again, this step is important!
Breading the Cheese Balls:
Breading is what gives these cheese balls their crispy, golden-brown exterior. We’re using a classic three-step breading process: flour, egg, and panko bread crumbs. The panko bread crumbs are key for that extra-crispy texture.
- Prepare three shallow dishes. In the first dish, place the all-purpose flour. In the second dish, place the beaten eggs. In the third dish, place the panko bread crumbs.
- Remove the cheese balls from the freezer. Working one at a time, dredge each cheese ball in the flour, making sure to coat it completely. Shake off any excess flour.
- Next, dip the floured cheese ball into the beaten eggs, ensuring it is fully coated. Let any excess egg drip off.
- Finally, roll the egg-coated cheese ball in the panko bread crumbs, pressing gently to adhere. Make sure the entire cheese ball is covered in bread crumbs.
- Place the breaded cheese ball back on the prepared baking sheet. Repeat with the remaining cheese balls.
- Once all the cheese balls are breaded, return them to the freezer for another 15-20 minutes. This will help the breading set and prevent it from falling off during frying.
Frying the Cheese Balls:
Now for the grand finale – frying! This is where the magic happens, and those cheese balls transform into golden, crispy, melty perfection. Be careful when working with hot oil, and always have a fire extinguisher nearby just in case.
- Pour the vegetable oil into a deep fryer or a large, heavy-bottomed pot. Heat the oil to 350°F (175°C). Use a thermometer to ensure the oil is at the correct temperature. If the oil is too hot, the cheese balls will burn on the outside before the inside is melted. If the oil is not hot enough, they will absorb too much oil and become greasy.
- Carefully add the breaded cheese balls to the hot oil in batches, being careful not to overcrowd the fryer or pot. Overcrowding will lower the oil temperature and result in soggy cheese balls. I usually fry about 4-5 at a time, depending on the size of my pot.
- Fry the cheese balls for 2-3 minutes, or until they are golden brown and crispy on all sides. Use a slotted spoon or a wire skimmer to turn them occasionally to ensure even cooking.
- Remove the fried cheese balls from the oil and place them on a wire rack lined with paper towels to drain any excess oil.
- Repeat with the remaining cheese balls.
Serving:
The best part! Serve these Bacon Jalapeno Popper Cheese Balls immediately while they are still hot and melty. They are absolutely delicious on their own, but they are even better with a dipping sauce. Ranch dressing or blue cheese dressing are classic choices, but feel free to get creative and try other sauces like sriracha mayo or a sweet chili sauce.
Enjoy! These are best served immediately, as the cheese will start to harden as they cool. But let’s be honest, they probably won’t last that long anyway!
Conclusion:
So, there you have it! These Bacon Jalapeno Popper Cheese Balls are truly a game-changer. I know, I know, I might be a little biased, but trust me on this one. The creamy, cheesy interior, the spicy kick from the jalapenos, and the salty, smoky bacon all come together in a symphony of flavor that will leave you wanting more. They’re incredibly easy to make, require minimal ingredients, and are guaranteed to be a hit at your next party, game night, or even just a casual evening at home. Seriously, what’s not to love?
But beyond just being delicious, these little bites are incredibly versatile. Think of them as a blank canvas for your culinary creativity! Want to dial up the heat? Add a pinch of cayenne pepper to the cheese mixture. Prefer a milder flavor? Remove the seeds and membranes from the jalapenos before dicing them. You could even swap out the cheddar cheese for pepper jack for an extra cheesy kick.
And the serving suggestions are endless! Serve them warm with a side of ranch dressing or blue cheese dressing for dipping. Arrange them on a platter with crackers and vegetables for a sophisticated appetizer spread. Or, get really creative and use them as a topping for burgers or salads. I’ve even been known to crumble them over a bowl of chili for an extra layer of flavor and texture.
For a fun variation, consider using different types of bacon. Applewood smoked bacon will add a touch of sweetness, while hickory smoked bacon will provide a more intense smoky flavor. You could even try using turkey bacon for a slightly healthier option.
Another great variation is to add a touch of sweetness to balance out the spice. A drizzle of honey or maple syrup over the finished cheese balls will create a delicious sweet and savory combination.
Don’t be afraid to experiment with different cheeses as well. Cream cheese is essential for the creamy texture, but you can easily swap out the cheddar cheese for other varieties like Monterey Jack, Colby Jack, or even a sharp provolone.
I’m telling you, once you try these Bacon Jalapeno Popper Cheese Balls, you’ll be hooked. They’re the perfect combination of flavors and textures, and they’re so easy to make that you’ll be whipping them up for every occasion.
I truly believe that this recipe is a must-try for anyone who loves cheese, bacon, and a little bit of spice. It’s a crowd-pleaser, a flavor explosion, and a guaranteed way to impress your friends and family.
So, what are you waiting for? Get into your kitchen and start cooking! I promise you won’t regret it. And when you do, please, please, please share your experience with me! I’d love to hear what you think of the recipe, what variations you tried, and how you served them. Tag me in your photos on social media, leave a comment below, or send me an email. I’m always eager to hear from my readers and see how they’re enjoying my recipes. Happy cooking, and enjoy every cheesy, spicy, bacon-y bite! I am confident that you will love this recipe as much as I do. Let me know what you think!
Bacon Jalapeno Popper Cheese Balls: The Ultimate Party Appetizer
Crispy, golden-brown cheese balls filled with a melty, cheesy, spicy bacon jalapeño mixture. Perfect appetizer or snack!
Ingredients
- 16 oz Cream Cheese, softened
- 1 cup Sharp Cheddar Cheese, shredded
- 1 cup Monterey Jack Cheese, shredded
- 1/2 cup Pepper Jack Cheese, shredded
- 1/2 cup Parmesan Cheese, grated
- 1/2 cup Cooked Bacon, crumbled (about 6 slices)
- 1/4 cup Pickled Jalapeños, finely diced (adjust to taste)
- 1 tbsp Jalapeño Juice (from the jar)
- 1 tsp Garlic Powder
- 1/2 tsp Onion Powder
- 1/4 tsp Smoked Paprika
- Pinch of Cayenne Pepper (optional)
- 1 cup All-Purpose Flour
- 2 large Eggs, beaten
- 2 cups Panko Bread Crumbs
- 1 cup Vegetable Oil, for frying
- Optional: Ranch Dressing or Blue Cheese Dressing, for dipping
Instructions
- In a large mixing bowl, combine the softened cream cheese, shredded cheddar cheese, shredded Monterey Jack cheese, shredded Pepper Jack cheese, and grated Parmesan cheese.
- Add the crumbled cooked bacon, diced pickled jalapeños, jalapeño juice, garlic powder, onion powder, smoked paprika, and cayenne pepper (if using).
- Mix all the ingredients together until thoroughly combined and smooth. Taste and adjust seasoning as needed.
- Cover the bowl with plastic wrap and refrigerate for at least 30 minutes, or up to 2 hours.
- Remove the cheese mixture from the refrigerator. Line a baking sheet with parchment paper or wax paper.
- Using a small cookie scoop or a spoon, scoop out about 1-2 tablespoons of the cheese mixture. Roll it between your palms to form a ball.
- Place the cheese ball on the prepared baking sheet. Repeat with the remaining cheese mixture, spacing the cheese balls evenly apart.
- Once all the cheese balls are formed, place the baking sheet in the freezer for at least 30 minutes.
- Prepare three shallow dishes. In the first dish, place the all-purpose flour. In the second dish, place the beaten eggs. In the third dish, place the panko bread crumbs.
- Remove the cheese balls from the freezer. Working one at a time, dredge each cheese ball in the flour, making sure to coat it completely. Shake off any excess flour.
- Next, dip the floured cheese ball into the beaten eggs, ensuring it is fully coated. Let any excess egg drip off.
- Finally, roll the egg-coated cheese ball in the panko bread crumbs, pressing gently to adhere. Make sure the entire cheese ball is covered in bread crumbs.
- Place the breaded cheese ball back on the prepared baking sheet. Repeat with the remaining cheese balls.
- Once all the cheese balls are breaded, return them to the freezer for another 15-20 minutes.
- Pour the vegetable oil into a deep fryer or a large, heavy-bottomed pot. Heat the oil to 350°F (175°C).
- Carefully add the breaded cheese balls to the hot oil in batches, being careful not to overcrowd the fryer or pot.
- Fry the cheese balls for 2-3 minutes, or until they are golden brown and crispy on all sides. Use a slotted spoon or a wire skimmer to turn them occasionally to ensure even cooking.
- Remove the fried cheese balls from the oil and place them on a wire rack lined with paper towels to drain any excess oil.
- Repeat with the remaining cheese balls.
- Serve immediately while hot and melty. Serve with ranch dressing or blue cheese dressing, if desired.
Notes
- Make sure the cream cheese is properly softened to prevent lumps.
- Chilling the cheese mixture and the breaded cheese balls is crucial for maintaining their shape during frying.
- Use a thermometer to ensure the oil is at the correct temperature.
- Fry in batches to avoid overcrowding the fryer.
- Serve immediately for the best texture and flavor.

Leave a Comment