
Homemade Apple Pie: Is there anything more comforting than the aroma of cinnamon and baked apples wafting through your kitchen? I think not! This isn’t just a dessert; it’s a warm hug on a plate, a nostalgic trip to Grandma’s kitchen, and a celebration of simple, wholesome ingredients.
The apple pie, while often considered quintessentially American, actually has roots that stretch back to Europe. Variations existed as far back as the Middle Ages! Over time, it evolved, adapting to local ingredients and tastes, eventually becoming the beloved classic we know and adore today. It symbolizes home, hearth, and the bounty of the harvest season.
But what is it about homemade apple pie that makes it so irresistible? It’s the perfect balance of sweet and tart, the tender, juicy apples nestled within a flaky, buttery crust. The warmth of the spices, like cinnamon and nutmeg, adds a layer of complexity that tantalizes the taste buds. And let’s be honest, the satisfaction of creating something so delicious from scratch is a reward in itself. Whether you’re serving it warm with a scoop of vanilla ice cream or enjoying a slice with a cup of coffee, apple pie is a guaranteed crowd-pleaser. So, let’s get baking and create a masterpiece that will fill your home with joy and deliciousness!

Ingredients:
- For the Crust:
- 2 ½ cups all-purpose flour, plus more for dusting
- 1 teaspoon salt
- 1 cup (2 sticks) unsalted butter, very cold and cut into cubes
- ½ cup ice water
- For the Apple Filling:
- 6-8 medium apples (such as Granny Smith, Honeycrisp, or a mix), peeled, cored, and sliced
- ¾ cup granulated sugar
- ¼ cup all-purpose flour
- 1 teaspoon ground cinnamon
- ¼ teaspoon ground nutmeg
- 2 tablespoons lemon juice
- 2 tablespoons unsalted butter, cut into small pieces
- For the Egg Wash (optional):
- 1 large egg
- 1 tablespoon milk or water
- For Sprinkling (optional):
- Turbinado sugar or granulated sugar
Preparing the Crust:
Okay, let’s get started with the most important part – the crust! A good crust makes or breaks an apple pie, so pay close attention. Don’t be intimidated; I’ll walk you through it.
- Combine Dry Ingredients: In a large bowl, whisk together the flour and salt. This ensures the salt is evenly distributed throughout the flour, which is crucial for flavor and gluten development.
- Cut in the Butter: Add the cold, cubed butter to the flour mixture. Using a pastry blender or your fingertips (work quickly to keep the butter cold!), cut the butter into the flour until the mixture resembles coarse crumbs. You should still see small pieces of butter – these are what create flaky layers. The size of the butter pieces is key; aim for pea-sized and slightly larger.
- Add Ice Water: Gradually add the ice water, one tablespoon at a time, mixing gently after each addition. Be careful not to overmix! You want just enough water to bring the dough together. The amount of water needed can vary depending on the humidity, so start with less and add more as needed. Stop adding water when the dough just starts to clump together.
- Form the Dough: Turn the dough out onto a lightly floured surface. Gently gather the dough into a ball. Divide the dough in half, flatten each half into a disc, wrap tightly in plastic wrap, and refrigerate for at least 2 hours, or preferably overnight. This chilling time is essential! It allows the gluten to relax, making the dough easier to roll out and preventing it from shrinking during baking.
Preparing the Apple Filling:
While the crust is chilling, let’s get that delicious apple filling ready. The aroma alone will make your kitchen smell amazing!
- Prepare the Apples: Peel, core, and slice the apples. I like to slice them about ¼-inch thick. Thicker slices will take longer to cook, while thinner slices might become mushy. Toss the sliced apples in a large bowl.
- Combine Filling Ingredients: In a separate small bowl, whisk together the sugar, flour, cinnamon, and nutmeg. The flour helps to thicken the filling as it bakes.
- Coat the Apples: Pour the sugar mixture over the apples and toss gently to coat evenly. Make sure all the apple slices are coated with the mixture.
- Add Lemon Juice and Butter: Add the lemon juice to the apple mixture. The lemon juice helps to prevent the apples from browning and adds a touch of brightness to the flavor. Dot the apple mixture with the small pieces of butter. The butter adds richness and flavor to the filling.
Assembling and Baking the Pie:
Now for the fun part – putting it all together and baking our masterpiece!
- Preheat Oven: Preheat your oven to 425°F (220°C). Place a baking sheet on the lower rack of the oven. This will help to catch any drips from the pie and prevent the bottom crust from becoming soggy.
- Roll Out the Bottom Crust: On a lightly floured surface, roll out one of the dough discs into a 12-inch circle. Gently transfer the dough to a 9-inch pie plate. Trim the edges of the dough, leaving about a 1-inch overhang. Crimp the edges of the dough using your fingers or a fork to create a decorative border. You can also use the tines of a fork to prick the bottom of the crust several times. This helps to prevent the crust from puffing up during baking.
- Add the Filling: Pour the apple filling into the prepared pie crust, mounding it slightly in the center.
- Roll Out the Top Crust: Roll out the second dough disc into a 12-inch circle. There are a few options for the top crust:
- Full Crust: Gently place the dough over the apple filling. Trim the edges, leaving about a 1-inch overhang. Crimp the edges together with the bottom crust to seal. Cut several slits in the top crust to allow steam to escape during baking. This will prevent the crust from becoming soggy.
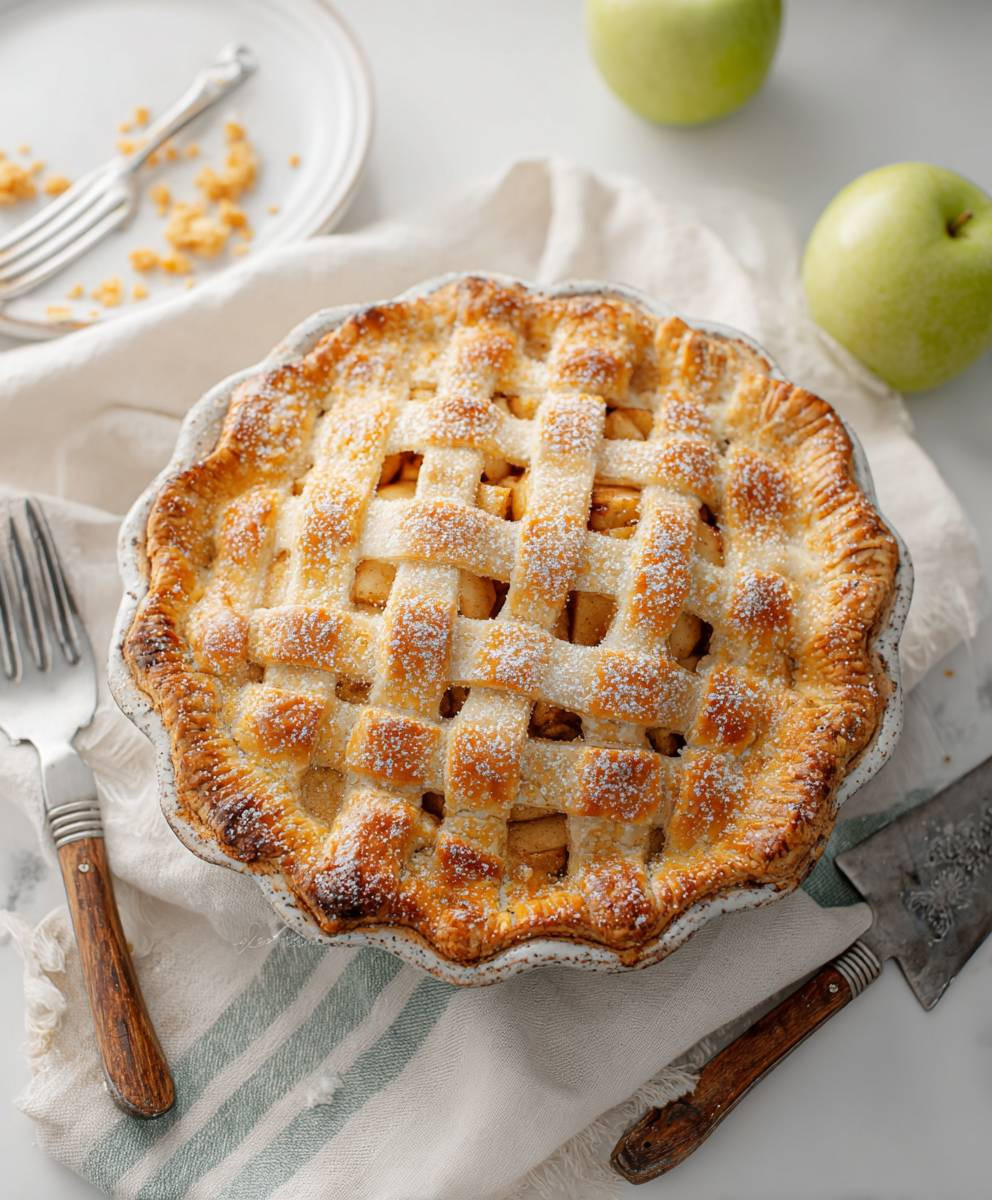
- Lattice Crust: Cut the dough into strips. Weave the strips over the apple filling in a lattice pattern. Trim the edges and crimp them to seal.
- Streusel Topping: If you prefer, you can skip the top crust altogether and use a streusel topping instead.
- Egg Wash (Optional): In a small bowl, whisk together the egg and milk or water. Brush the top crust with the egg wash. This will give the crust a beautiful golden-brown color.
- Sprinkle with Sugar (Optional): Sprinkle the top crust with turbinado sugar or granulated sugar. This adds a touch of sweetness and sparkle.
- Bake: Place the pie on the preheated baking sheet in the oven. Bake for 15 minutes at 425°F (220°C), then reduce the oven temperature to 375°F (190°C) and bake for another 45-50 minutes, or until the crust is golden brown and the filling is bubbly. If the crust starts to brown too quickly, you can cover the edges with aluminum foil.
- Cool: Remove the pie from the oven and let it cool completely on a wire rack before slicing and serving. This is crucial! If you cut into the pie while it’s still hot, the filling will be runny. The cooling process allows the filling to thicken and set.
Tips for Success:
- Keep everything cold: Cold butter and ice water are essential for a flaky crust.
- Don’t overmix the dough: Overmixing develops the gluten in the flour, resulting in a tough crust.
- Chill the dough: Chilling the dough allows the gluten to relax and prevents the crust from shrinking during baking.
- Use a variety of apples: A mix of sweet and tart apples will give your pie a more complex flavor.
- Don’t skip the lemon juice: Lemon juice prevents the apples from browning and adds a touch of brightness to the flavor.
- Let the pie cool completely: Cooling allows the filling to thicken and set.
Serving Suggestions:
Serve your homemade apple pie warm or at room temperature. It’s delicious on its own, but even better with a scoop of vanilla ice cream or a dollop of whipped cream. A sprinkle of cinnamon or a drizzle of caramel sauce adds the perfect finishing touch.
Enjoy your delicious homemade apple pie! I hope you found this recipe helpful and easy to follow. Happy baking!
Conclusion:
And there you have it! This homemade apple pie recipe isn’t just another dessert; it’s a warm hug on a plate, a nostalgic trip to Grandma’s kitchen, and a guaranteed crowd-pleaser all rolled into one delicious package. I truly believe that once you’ve tasted the flaky, buttery crust and the perfectly spiced, tender apple filling, you’ll understand why I consider this a must-try recipe. It’s the kind of pie that makes memories, the kind that becomes a family tradition.
But what makes this pie truly special is its versatility. While it’s absolutely divine served warm with a scoop of vanilla ice cream (my personal favorite!), don’t be afraid to experiment! A dollop of freshly whipped cream adds a touch of elegance, while a drizzle of caramel sauce elevates it to a whole new level of indulgence. For a more rustic touch, try serving it with a sharp cheddar cheese – the sweet and savory combination is surprisingly delightful.
Looking for variations? Consider adding a handful of chopped walnuts or pecans to the apple filling for a nutty crunch. A sprinkle of cinnamon sugar on top of the crust before baking adds extra sweetness and sparkle. If you’re feeling adventurous, you could even incorporate other fruits like cranberries or pears for a unique twist. And for those who prefer a crumble topping, simply replace the top crust with a buttery oat crumble for a delightful textural contrast. You can even make mini apple pies using muffin tins for individual servings – perfect for parties or portion control!
This homemade apple pie recipe is more than just a set of instructions; it’s an invitation to create something truly special. It’s a chance to slow down, connect with your loved ones, and enjoy the simple pleasures of life. The aroma alone, filling your kitchen with the scent of cinnamon and baked apples, is enough to lift your spirits and create a warm, inviting atmosphere.
I know that making a pie from scratch can seem daunting, but trust me, it’s worth the effort. And with this recipe, I’ve broken down the process into easy-to-follow steps, so even beginner bakers can achieve pie perfection. Don’t be afraid to get your hands dirty, embrace the imperfections, and most importantly, have fun!
So, what are you waiting for? Gather your ingredients, preheat your oven, and get ready to bake the best homemade apple pie you’ve ever tasted. I’m confident that this recipe will become a staple in your kitchen, a go-to dessert for holidays, special occasions, or simply a cozy night in.
I’m so excited for you to try this recipe and experience the joy of baking a truly exceptional apple pie. Once you’ve made it, I’d love to hear about your experience! Share your photos, tips, and variations in the comments below. Let me know what you thought of the recipe, what you changed, and how it turned out. Your feedback is invaluable, and it helps me to continue creating recipes that you’ll love. Happy baking!
Homemade Apple Pie: The Ultimate Recipe for Fall
Classic homemade apple pie with a flaky crust and a sweet and tart apple filling, perfect for any occasion.
Ingredients
- 2 ½ cups all-purpose flour, plus more for dusting
- 1 teaspoon salt
- 1 cup (2 sticks) unsalted butter, very cold and cut into cubes
- ½ cup ice water
- 6-8 medium apples (such as Granny Smith, Honeycrisp, or a mix), peeled, cored, and sliced
- ¾ cup granulated sugar
- ¼ cup all-purpose flour
- 1 teaspoon ground cinnamon
- ¼ teaspoon ground nutmeg
- 2 tablespoons lemon juice
- 2 tablespoons unsalted butter, cut into small pieces
- 1 large egg
- 1 tablespoon milk or water
- Turbinado sugar or granulated sugar
Instructions
- In a large bowl, whisk together the flour and salt.
- Cut in the cold, cubed butter using a pastry blender or your fingertips until the mixture resembles coarse crumbs with pea-sized butter pieces.
- Gradually add the ice water, one tablespoon at a time, mixing gently until the dough just starts to clump together.
- Turn the dough out onto a lightly floured surface, gather into a ball, divide in half, flatten into discs, wrap in plastic wrap, and refrigerate for at least 2 hours (or overnight).
- Peel, core, and slice the apples about ¼-inch thick. Toss in a large bowl.
- In a separate small bowl, whisk together the sugar, flour, cinnamon, and nutmeg.
- Pour the sugar mixture over the apples and toss gently to coat evenly.
- Add the lemon juice and dot with small pieces of butter.
- Preheat oven to 425°F (220°C). Place a baking sheet on the lower rack.
- On a lightly floured surface, roll out one dough disc into a 12-inch circle. Transfer to a 9-inch pie plate. Trim and crimp the edges. Prick the bottom of the crust with a fork.
- Pour the apple filling into the prepared pie crust, mounding it slightly in the center.
- Roll out the second dough disc into a 12-inch circle. Choose your top crust option:
- Full Crust: Place over filling, trim, crimp, and cut slits.
- Lattice Crust: Cut into strips, weave over filling, trim, and crimp.
- Streusel Topping: (Not provided in the original recipe, so you’d need to add a separate streusel recipe if desired).
- (Optional) Whisk egg and milk/water for egg wash. Brush over the top crust.
- (Optional) Sprinkle with turbinado or granulated sugar.
- Bake for 15 minutes at 425°F (220°C), then reduce oven temperature to 375°F (190°C) and bake for another 45-50 minutes, or until the crust is golden brown and the filling is bubbly. Cover edges with foil if browning too quickly.
- Cool completely on a wire rack before slicing and serving.
Notes
- Keep all ingredients cold for the flakiest crust.
- Don’t overmix the dough.
- Chilling the dough is essential.
- Use a mix of sweet and tart apples for the best flavor.
- Lemon juice prevents browning and adds brightness.
- Cool the pie completely before slicing to allow the filling to set.
- Serve warm or at room temperature with vanilla ice cream or whipped cream.
Leave a Comment