
Gordon Ramsay Tiramisu is not just a dessert; it’s a delightful experience that transports you straight to Italy with every bite. This classic Italian treat, known for its rich layers of coffee-soaked ladyfingers and creamy mascarpone, has a fascinating history that dates back to the 1960s in the Veneto region. Over the years, tiramisu has become a beloved staple in many households, and Gordon Ramsay’s version elevates this traditional recipe to new heights with his signature flair.
People adore Gordon Ramsay Tiramisu for its perfect balance of flavors and textures. The smooth, velvety mascarpone contrasts beautifully with the slightly crunchy ladyfingers, while the espresso adds a robust depth that keeps you coming back for more. Plus, it’s a convenient dessert that can be prepared ahead of time, making it ideal for gatherings or a cozy night in. Join me as we dive into the world of Gordon Ramsay Tiramisu and discover how to create this irresistible dessert in your own kitchen!

Ingredients:
- 4 large egg yolks
- 100g (1/2 cup) granulated sugar
- 500g (2 cups) mascarpone cheese
- 300ml (1 1/4 cups) heavy cream
- 1 cup strong brewed coffee, cooled
- 1/2 cup coffee liqueur (optional)
- 24 ladyfinger biscuits (savoiardi)
- 2 tablespoons cocoa powder, for dusting
- Dark chocolate shavings, for garnish (optional)
Preparing the Mascarpone Mixture
- In a large mixing bowl, whisk together the egg yolks and granulated sugar. I like to use a hand mixer for this step, as it makes the process quicker and easier. Whisk until the mixture becomes pale and creamy, which usually takes about 5 minutes.
- Once the egg yolk mixture is ready, gently fold in the mascarpone cheese. I find it helpful to add the mascarpone in two or three additions, folding it in carefully with a spatula to maintain the lightness of the mixture. Be sure to scrape the sides of the bowl to incorporate everything evenly.
- In a separate bowl, whip the heavy cream until it forms stiff peaks. This step is crucial for achieving that light and airy texture in the tiramisu. I usually start on a low speed and gradually increase it to medium-high until the cream thickens.
- Once the cream is whipped, gently fold it into the mascarpone mixture. Again, be careful not to deflate the whipped cream. Use a spatula to fold it in until just combined, ensuring there are no streaks of cream left.
Preparing the Coffee Mixture
- While you’re preparing the mascarpone mixture, brew a strong cup of coffee. I prefer using an espresso machine for a rich flavor, but any strong coffee will do. Allow the coffee to cool to room temperature.
- If you’re using coffee liqueur, mix it with the cooled coffee in a shallow dish. This will be used for dipping the ladyfingers. If you prefer a non-alcoholic version, you can skip this step and just use the coffee.
Assembling the Tiramisu
- Now it’s time to assemble the tiramisu! Start by dipping each ladyfinger into the coffee mixture. I like to dip them for about 1-2 seconds on each side; you want them to soak up some coffee but not become too soggy.
- Arrange a layer of dipped ladyfingers in the bottom of a rectangular or square dish. I usually use a 9×9 inch dish, but you can adjust based on your preference. Make sure the ladyfingers are placed closely together to create a solid base.
- Once the first layer of ladyfingers is in place, spread half of the mascarpone mixture over the top. Use a spatula to smooth it out evenly, covering all the ladyfingers.
- Repeat the process with another layer of dipped ladyfingers, followed by the remaining mascarpone mixture. Smooth it out again, ensuring it’s even and looks inviting.
Chilling the Tiramisu
- Cover the dish with plastic wrap and place it in the refrigerator. I recommend letting it chill for at least 4 hours, but if you can, overnight is even better. This allows the flavors to meld beautifully and the tiramisu to set properly.
- Before serving, dust the top of the tiramisu with cocoa powder. I like to use a fine mesh sieve for an even distribution. You can also add dark chocolate shavings on top for an extra touch of elegance.
Serving the Tiramisu
- When you’re ready to serve, use a sharp knife to cut the tiramisu into squares. I find it helpful to dip the knife in hot water before cutting to get clean edges.
- Use a spatula to lift each piece out of the dish and onto individual plates. You can garnish with additional cocoa powder or chocolate shavings if desired.
- Enjoy your homemade Gordon Ramsay-inspired tir

Conclusion:
In conclusion, this Gordon Ramsay Tiramisu recipe is an absolute must-try for anyone looking to impress their friends and family with a delightful dessert that combines rich flavors and a creamy texture. The balance of coffee and cocoa, along with the luscious mascarpone, creates a heavenly experience that will leave your taste buds dancing. Whether you’re hosting a dinner party or simply indulging in a sweet treat at home, this tiramisu is sure to be a crowd-pleaser. For serving suggestions, consider pairing your tiramisu with a dusting of cocoa powder or a drizzle of chocolate sauce for an extra touch of elegance. You can also experiment with variations by adding a splash of your favorite liqueur, such as amaretto or coffee liqueur, to enhance the flavor profile. If you’re feeling adventurous, try incorporating seasonal fruits like raspberries or strawberries for a refreshing twist. I encourage you to give this Gordon Ramsay Tiramisu recipe a try and share your experience with friends and family. I would love to hear how it turned out for you! Don’t forget to snap a picture and share it on social media, tagging your culinary creations. Trust me, once you taste this delightful dessert, you’ll want to make it again and again. Happy baking! Print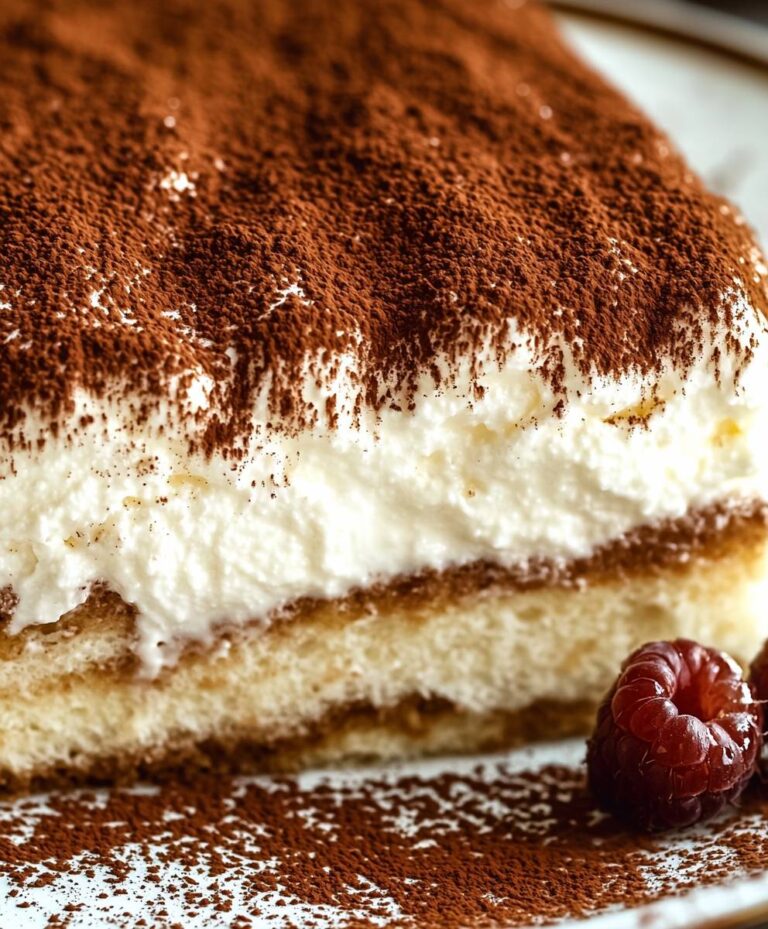
Gordon Ramsay Tiramisu: A Step-by-Step Guide to Mastering This Classic Dessert
Experience the indulgence of this classic Tiramisu, featuring layers of coffee-soaked ladyfingers and a creamy mascarpone mixture. Perfect for any occasion, this dessert is a delightful blend of rich flavors and textures that will impress your guests.
- Total Time: 270 minutes
- Yield: 8 servings 1x
Ingredients
- 4 large egg yolks
- 100g (1/2 cup) granulated sugar
- 500g (2 cups) mascarpone cheese
- 300ml (1 1/4 cups) heavy cream
- 1 cup strong brewed coffee, cooled
- 1/2 cup coffee liqueur (optional)
- 24 ladyfinger biscuits (savoiardi)
- 2 tablespoons cocoa powder, for dusting
- Dark chocolate shavings, for garnish (optional)
Instructions
- In a large mixing bowl, whisk together the egg yolks and granulated sugar until pale and creamy, about 5 minutes.
- Gently fold in the mascarpone cheese in two or three additions, ensuring even incorporation.
- In a separate bowl, whip the heavy cream until stiff peaks form.
- Carefully fold the whipped cream into the mascarpone mixture until just combined.
- Brew a strong cup of coffee and allow it to cool to room temperature.
- If using, mix the coffee liqueur with the cooled coffee in a shallow dish.
- Dip each ladyfinger into the coffee mixture for 1-2 seconds on each side.
- Arrange a layer of dipped ladyfingers in the bottom of a rectangular or square dish.
- Spread half of the mascarpone mixture over the ladyfingers, smoothing it out evenly.
- Repeat with another layer of dipped ladyfingers followed by the remaining mascarpone mixture.
- Cover the dish with plastic wrap and refrigerate for at least 4 hours, preferably overnight.
- Before serving, dust the top with cocoa powder and add dark chocolate shavings if desired.
- Cut the tiramisu into squares using a sharp knife dipped in hot water for clean edges.
- Lift each piece onto individual plates and garnish as desired.
- Enjoy your homemade Tiramisu!
Notes
- For a non-alcoholic version, omit the coffee liqueur.
- Allowing the tiramisu to chill overnight enhances the flavors.
- Prep Time: 30 minutes
- Cook Time: 0 minutes
Leave a Comment